The digital marketing arena thrives on captivating visuals, and video content reigns supreme. But simply having video isn’t enough; it’s about crafting compelling narratives that convert. Mastering tutorials on video editing software is no longer optional for marketers; it’s a non-negotiable skill that directly impacts your campaign performance. Ready to transform your raw footage into marketing masterpieces?
Key Takeaways
- Select editing software based on your team’s existing skill set and project complexity, with DaVinci Resolve offering a powerful free option for professional results.
- Implement a structured project setup, including proxy media generation and organized asset management, to prevent performance bottlenecks and lost files.
- Master key editing techniques like jump cuts, L-cuts, and J-cuts to improve pacing and maintain viewer engagement, reducing typical drop-off rates.
- Utilize advanced color grading tools, specifically HSL qualifiers and scopes, to ensure brand consistency and visual appeal across all video assets.
- Export videos with platform-specific settings, such as H.264 for web and ProRes for high-quality archival, to maximize visual fidelity and delivery efficiency.
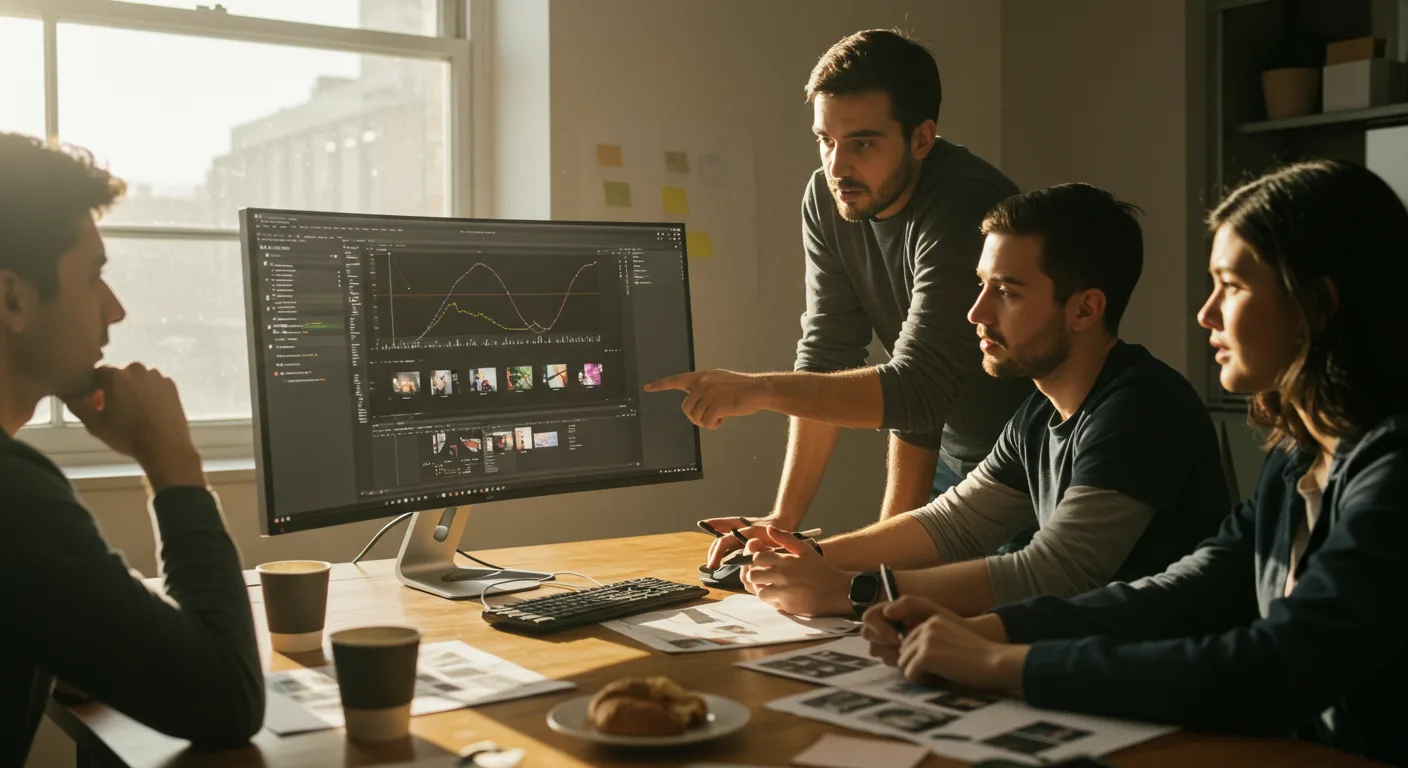
1. Choosing Your Battlefield: Selecting the Right Editing Software
Before you even think about cutting a frame, you need the right tools. This isn’t a one-size-fits-all decision; your choice of software dictates your workflow, capabilities, and even your team’s learning curve. For marketing teams, I generally recommend focusing on three main contenders: DaVinci Resolve, Adobe Premiere Pro, and Final Cut Pro (if you’re a Mac-only shop). Each has its strengths, but my personal preference, especially for teams starting out or on a budget, leans heavily towards DaVinci Resolve. Its free version is shockingly powerful, offering professional-grade editing, color correction, visual effects, and audio post-production all under one roof.
DaVinci Resolve Specifics: Download the free version from Blackmagic Design’s website. It runs beautifully on Windows, macOS, and Linux. For most marketing tasks, you won’t need the Studio version initially. Its node-based color grading is world-class, making your brand’s visual identity pop consistently across campaigns.
Premiere Pro Specifics: Part of the Adobe Creative Cloud suite, Premiere Pro integrates seamlessly with Photoshop and After Effects. If your team already uses these for graphic design and motion graphics, it’s a natural fit. Subscription-based, it offers robust features and a vast community for support.
Final Cut Pro Specifics: Exclusively for macOS, Final Cut Pro boasts an intuitive interface and excellent performance on Apple hardware. Its magnetic timeline is a love-it-or-hate-it feature, but it speeds up editing for many. A one-time purchase, which can be appealing.
PRO TIP: Don’t get caught up in the “best” software debate. The “best” is the one your team can use effectively and efficiently. If your team already has Premiere Pro experience, sticking with it might be faster than forcing a switch to Resolve, despite its incredible free offerings. Time is money in marketing, after all.
2. Setting Up for Success: Project Organization and Ingest
Think of your editing project as a meticulously organized office. Messy desks lead to lost documents and missed deadlines. The same applies here. A well-structured project folder on your hard drive is paramount. Before importing a single clip, create a main project folder (e.g., “ClientName_CampaignName_VideoEdit_2026”) and subdivide it:
- 01_Footage: Raw video files, organized by shoot date or camera.
- 02_Audio: Voiceovers, music, sound effects.
- 03_Graphics: Logos, lower thirds, title cards (PSDs, AI files, transparent PNGs).
- 04_Exports: Final deliverables and intermediate renders.
- 05_ProjectFiles: Your actual DaVinci Resolve project file (.drp) or Premiere Pro project file (.prproj).
DaVinci Resolve Specifics:
- Launch DaVinci Resolve and click “New Project.” Give it a descriptive name.
- In the “Media” page (the house icon at the bottom), navigate to your “01_Footage” folder.
- Ingest and Proxy Generation: For smoother editing, especially with high-resolution footage, generate proxies. Right-click your selected clips in the Media Pool > “Generate Proxy Media.” Choose H.264 or ProRes Proxy for excellent performance. This creates smaller, editable versions of your files without affecting the originals.
- Drag your organized folders from your hard drive directly into the Media Pool in Resolve. It will mirror your folder structure, which is incredibly helpful.
Common Mistake: Disorganized Media & Missing Files
We’ve all been there. You open a project, and half your media is “offline.” This usually happens because files were moved, renamed, or deleted after being imported. Always keep your media within your main project folder structure. If you must move files, do it within the editing software itself, not your operating system’s file explorer. I had a client last year whose entire social media campaign was delayed by three days because their junior editor moved all the raw footage to a “cleanup” folder, breaking every link in the project. A nightmare.
3. The Art of the Cut: Basic Editing Workflow
Now for the fun part: shaping your story. This is where you transform hours of footage into a concise, impactful message. The goal for marketing videos is usually engagement and clarity, not avant-garde cinema.
DaVinci Resolve Specifics:
- Switch to the “Edit” page (the scissor icon).
- Drag your primary clips from the Media Pool onto the timeline. Start with your “A-roll” – the main narrative or interview segments.
- Rough Cut: Focus on getting the story down. Don’t worry about perfection. Use the ‘I’ key to mark an “in” point and the ‘O’ key for an “out” point on your clips in the viewer, then drag them to the timeline.
- Jump Cuts: These are your best friend for pacing. If someone pauses too long or fumbles a word, cut it out. Select the clip, use the blade tool (B) to make cuts, then delete the unwanted segment. Drag the remaining clips together. This creates an energetic, fast-paced feel.
- B-roll Integration: Layer your “B-roll” (supplementary footage like product shots, demonstrations, or atmospheric scenes) over your A-roll. Drag these clips onto a video track above your primary footage. This covers jump cuts and adds visual interest. Adjust opacity if you want a subtle overlay.
- L-Cuts and J-Cuts: These are crucial for smooth transitions between audio and video.
- L-Cut: The audio from the outgoing clip extends under the video of the incoming clip. This keeps dialogue flowing naturally while the visual changes. To do this in Resolve, unlink your audio and video (Alt+Click on the clip, or right-click > “Link Clips”), then drag the audio tail of the first clip to overlap the start of the second clip’s video.
- J-Cut: The audio from the incoming clip starts before the video of that clip appears. This builds anticipation or provides context before the visual reveals itself. Do the opposite of an L-Cut: drag the audio head of the second clip to overlap the end of the first clip’s video.
- Transitions: Use sparingly. A simple cross-dissolve (Ctrl+T) is usually sufficient between scenes. Overuse of fancy transitions screams amateur hour.
PRO TIP: Watch your edits with the sound off, then with the picture off. This helps you identify pacing issues, whether the visuals are telling the story independently, and if the audio flows well without visual distraction. It’s a trick many professional editors use to isolate problems.
| Factor | DaVinci Resolve (Free) | DaVinci Resolve Studio (Paid) |
|---|---|---|
| Resolution Output | Up to 4K UHD | Up to 32K, unlimited frames |
| AI Features | Limited, basic tracking | Advanced AI, magic mask, object removal |
| Collaboration Tools | Basic project sharing | Multi-user real-time collaboration |
| GPU Acceleration | Standard GPU usage | Optimized for multiple GPUs |
| Codec Support | Common formats only | ProRes, H.265 10-bit, advanced codecs |
| Marketing Templates | Community templates | Extensive built-in marketing templates |
4. Sound and Fury: Audio Editing and Mixing
Bad audio kills a video faster than bad visuals. Period. Your marketing message needs to be crystal clear. Don’t neglect this step.
DaVinci Resolve Specifics:
- Switch to the “Fairlight” page (the music note icon). This is Resolve’s dedicated audio workspace.
- Noise Reduction: If your dialogue has background hum or hiss, use the “Noise Reduction” effect. Drag it onto your audio clip. In the inspector, click “Analyze” on a section of pure noise, then adjust the threshold and reduction levels. Don’t overdo it, or your audio will sound underwater.
- Equalization (EQ): Use the “Parametric EQ” to clean up voices. Often, a slight boost around 1kHz-3kHz can improve clarity, and a gentle roll-off below 80Hz removes rumble. Every voice is different, so listen critically.
- Compression: The “Compressor/Limiter” effect helps even out volume differences. Set a threshold, ratio, attack, and release. This makes quiet parts louder and loud parts softer, ensuring your audience doesn’t constantly adjust their volume.
- Music Bed: Add your background music to a separate audio track. Crucially, duck the music under dialogue. Use keyframes on the volume line (the horizontal line on the audio clip) to lower the music when someone speaks and raise it when they stop. A good starting point for dialogue-heavy videos is to have music around -20dB to -25dB during speech.
- Sound Effects (SFX): Use SFX judiciously to enhance key moments – a “whoosh” for a logo animation, a subtle “click” for a UI interaction.
Common Mistake: Inconsistent Audio Levels
Nothing is more jarring than music suddenly blasting or dialogue becoming inaudible. We ran into this exact issue at my previous firm when a new hire exported a client testimonial video with music levels that dwarfed the speaker’s voice. The client sent it back immediately. Always aim for consistent loudness, especially for dialogue. Use Resolve’s built-in audio meters to monitor levels; aim for dialogue peaks around -6dB to -3dB.
5. Polishing the Picture: Color Correction and Grading
This is where you make your video look professional and on-brand. Color correction fixes technical issues (white balance, exposure), while color grading applies a stylistic look.
DaVinci Resolve Specifics:
- Switch to the “Color” page (the magic wand icon). This is Resolve’s powerhouse.
- Node-Based Workflow: Resolve uses nodes, which are like layers for color adjustments. Create a new node (Alt+S) for each major adjustment.
- Primary Correction (Node 1):
- White Balance: Use the eyedropper tool next to the “Temp” and “Tint” sliders to click on something neutral gray or white in your image.
- Exposure: Adjust “Lift” (shadows), “Gamma” (midtones), and “Gain” (highlights) in the “Primaries Wheels” or “Log Wheels” panel. Monitor your “Scopes” (Parade, Waveform, Vectorscope) to ensure you’re not crushing blacks or clipping whites.
- Contrast & Saturation: Fine-tune these to make your image pop without looking artificial.
- Secondary Adjustments (Node 2+):
- HSL Qualifiers: Use the eyedropper tool in the “Qualifier” panel to select specific colors (e.g., your brand’s primary color). Then, use the wheels or sliders to adjust only that color’s hue, saturation, or luminance. This is fantastic for ensuring brand colors are consistent.
- Power Windows: Draw shapes (circles, squares, custom polygons) around specific areas of your image to apply adjustments only within those areas. For example, brighten a face or darken a distracting background.
- Color Grading (Node Last): Apply your creative look. This could be a warm filmic look, a cool corporate feel, or a vibrant, energetic style. Use LUTs (Look Up Tables) as a starting point, but always fine-tune them.
PRO TIP: Use still frames from your brand guidelines as a reference. Import them into Resolve’s “Gallery” and use the “Wipe” function to compare your graded footage directly against the approved brand colors. This ensures visual consistency across all your marketing assets, which, according to Nielsen’s 2023 Brand Consistency Report, significantly boosts brand recognition and recall.
6. Exporting Your Masterpiece: Delivery Settings
You’ve poured hours into your edit; don’t fumble the final step. Export settings are critical for quality and compatibility. Different platforms require different specifications.
DaVinci Resolve Specifics:
- Switch to the “Deliver” page (the rocket ship icon).
- Render Settings:
- Format: For web and social media, QuickTime or MP4 are standard. MP4 is generally more universally compatible.
- Codec: H.264 (for MP4) or H.265 (HEVC) for QuickTime. H.264 is the workhorse for web delivery, offering a good balance of quality and file size. H.265 provides better compression at the same quality but might have compatibility issues with older systems.
- Resolution: Match your timeline resolution (e.g., 1920×1080 for Full HD, 3840×2160 for 4K).
- Frame Rate: Match your timeline frame rate (e.g., 23.976, 24, 25, 29.97, 30).
- Quality: For YouTube, Vimeo, and most social platforms, a “Restrict to” bitrate of 20,000-30,000 Kb/s for 1080p H.264 is a good starting point. For 4K, aim for 40,000-60,000 Kb/s. Higher bitrates mean better quality but larger file sizes.
- Data Levels: Set to “Full” for web/digital delivery.
- Audio Codec: AAC.
- Audio Bitrate: 320 kbps.
- Naming Convention: Use a clear naming convention:
ProjectName_Campaign_Platform_Version_Date.mp4(e.g.,SummerSale_InstagramReel_V2_20260715.mp4). - Click “Add to Render Queue,” then “Start Render.”
PRO TIP: Always export a high-quality “master” file (e.g., ProRes 422 HQ) and then create platform-specific versions from that master. This way, if social media specs change, you don’t have to re-render from your editing project; you can just re-export from your master file. According to the IAB Video Advertising & Podcast Report 2023, video consumption continues to diversify across platforms, making adaptive export strategies more crucial than ever.
Mastering these video editing software tutorials isn’t about becoming a Hollywood editor; it’s about empowering your marketing efforts with visuals that truly resonate. By taking control of your video production, you ensure brand consistency, elevate message clarity, and ultimately, drive better campaign results. Learn how to boost ROAS with video ads that convert more effectively.
What’s the difference between color correction and color grading?
Color correction is the technical process of fixing issues like white balance, exposure, and contrast to make the image look natural and accurate. It aims for a neutral baseline. Color grading is the creative process of applying a stylistic look or mood to the footage, often after correction, to achieve a specific aesthetic or brand identity.
Should I use free stock music or pay for licensed tracks?
While free stock music might seem appealing, it often lacks uniqueness and can be overused. For professional marketing videos, I strongly recommend paying for licensed tracks from reputable music libraries like Artlist or Epidemic Sound. This ensures high-quality audio, avoids copyright issues, and allows for greater creative distinction. The investment is minimal compared to the impact on your brand’s perceived professionalism.
How important is storage speed for video editing?
Extremely important. Slow storage (like traditional HDDs) can cause choppy playback, dropped frames, and long render times, especially with high-resolution footage. I always recommend using fast SSDs (Solid State Drives) or NVMe drives for your project files and media. External SSDs connected via Thunderbolt or USB 3.2 Gen 2 are excellent options for portable editing setups.
Can I edit 4K video on an older computer?
It’s challenging but possible, especially if you leverage proxy workflows. Generating proxy media (smaller, easier-to-process versions of your 4K files) allows you to edit smoothly even on less powerful machines. Your final export will still use the original 4K files, so quality isn’t compromised. However, render times will likely be longer.
What’s the single most common mistake beginners make in video editing for marketing?
Forgetting their audience. Beginners often get caught up in flashy effects or intricate edits, losing sight of the core marketing message. Every cut, every sound, every color choice should serve to communicate your message clearly and engage your target demographic. Simplicity and clarity often outperform complexity.


