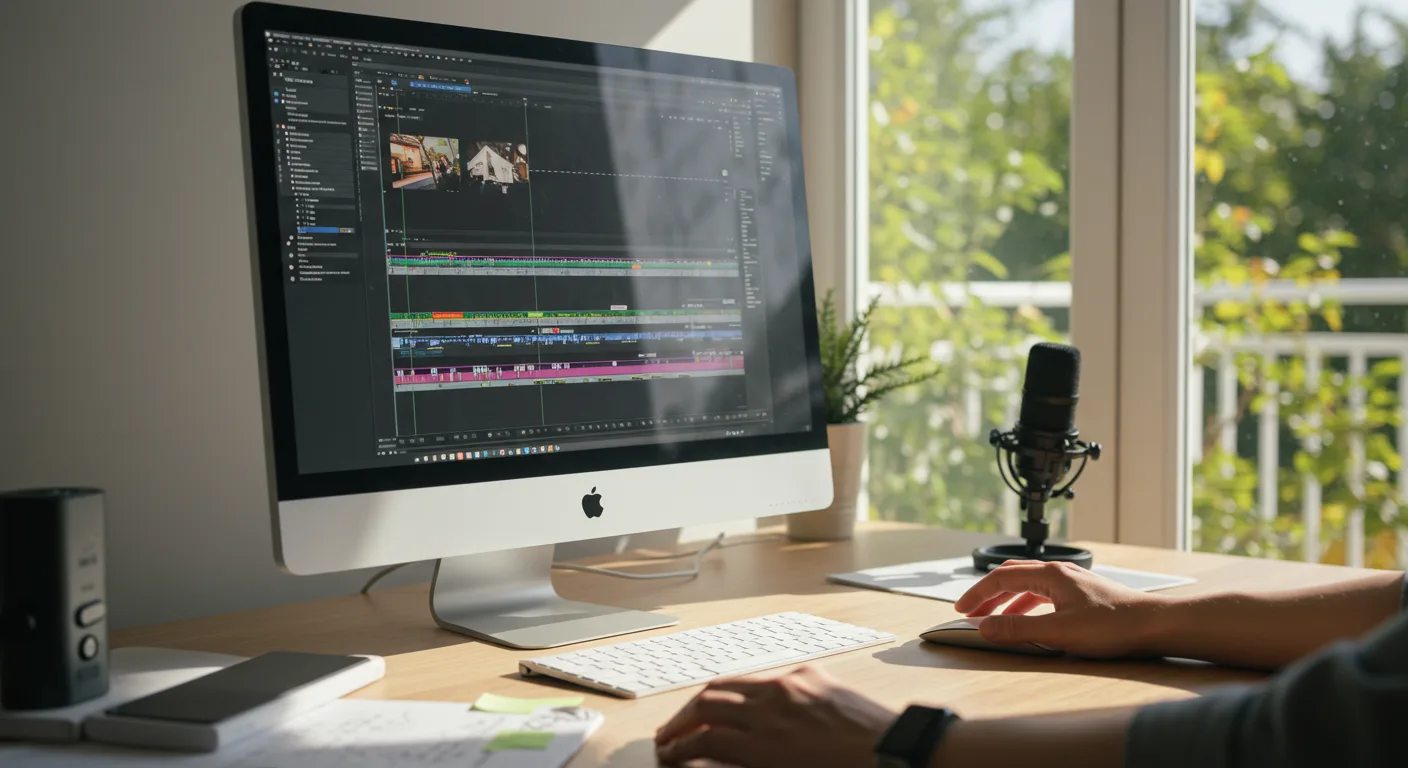
As a video marketing professional, I’ve seen firsthand how efficient editing can make or break a campaign. Final Cut Pro, with its intuitive interface and powerful feature set, stands as my primary tool for crafting compelling narratives that convert. However, simply owning the software isn’t enough; mastering its nuances for marketing content is where real impact is made. Are you truly maximizing Final Cut Pro’s potential for your marketing initiatives?
Key Takeaways
- Optimize your Mac’s storage and performance settings before launching Final Cut Pro to prevent slowdowns and crashes during intensive editing.
- Implement a consistent, logical library and project naming convention, such as “ClientName_CampaignName_Date_ProjectV1,” to ensure quick asset retrieval and collaboration.
- Utilize Proxy Media for all 4K+ footage by selecting “Create Proxy Media” during import to achieve smooth playback and editing on less powerful machines.
- Master Roles for efficient audio mixing and export, assigning specific roles like “Dialogue,” “Music,” and “SFX” to tracks for streamlined post-production.
- Export final marketing videos using the “Computer” setting with the H.264 codec for web distribution, adjusting resolution to 1080p or 4K based on platform requirements.
1. Optimize Your System Before You Start
Before even launching Final Cut Pro, a common mistake I see even seasoned editors make is neglecting their system’s health. You wouldn’t run a marathon without stretching, would you? The same principle applies here. Video editing is resource-intensive, and a sluggish system means lost time and creative frustration.
First, ensure your Mac’s operating system is up to date. As of 2026, I recommend macOS Sonoma 14.x or later for optimal compatibility and performance with Final Cut Pro 10.7.x. Next, and this is non-negotiable for me, free up internal storage. Aim for at least 20-30% free space on your primary drive. I regularly use DaisyDisk to visualize and clear large, unnecessary files. It’s a small investment that pays dividends in stability.
For your Final Cut Pro library and media, always use a fast external drive. We exclusively work with Thunderbolt 4 SSDs at my agency, preferably those with read/write speeds exceeding 2000 MB/s. Connect it directly to your Mac, not through a hub if you can avoid it. In Final Cut Pro’s preferences (Final Cut Pro > Settings > Playback), ensure “Render background tasks” is set to “Off” until you need it. This prevents unnecessary rendering that can slow down your active editing.
Pro Tip: Dedicated Cache Drive
For high-volume projects, consider dedicating a separate, fast external SSD solely for your Final Cut Pro cache files. In your Library Properties (select your Library in the Libraries sidebar, then look at the Inspector), click “Modify Settings” under “Storage Locations” and set “Cache” to this dedicated drive. This isolates the cache from your media, reducing bottlenecks.
2. Establish a Robust Library and Project Organization System
Disorganization is the silent killer of efficiency. Trust me, I’ve spent countless hours sifting through poorly named folders on client servers. When dealing with marketing campaigns, you’re not just editing one video; you’re often producing multiple versions for different platforms, A/B tests, and audience segments. A consistent organizational structure is paramount.
Within Final Cut Pro, create a new Library for each major client or campaign. Name it logically, for instance, “ClientName_CampaignName_2026”. Inside this Library, create Events for specific shoot days, asset types (e.g., “B-Roll_Footage,” “Graphics_Assets,” “Music_SFX”), or even different video versions. For example, an event named “ProductLaunch_PromoShoot_Day1” makes finding specific clips instantaneous. Your Projects should follow a similar convention: “ClientName_CampaignName_MainEdit_V1”, then “ClientName_CampaignName_InstagramStory_V1,” and so on.
When importing media, always select “Leave files in place” if your media is already on your fast external drive. This avoids duplicating footage, saving precious storage. If you must copy, ensure it’s going to your designated external media folder. I had a client last year who insisted on copying all media to their internal drive, only to run out of space mid-project. We had to pause for a day just to offload and re-link everything – a costly mistake.
Common Mistake: Default Settings for Imports
Many users just hit “Import All” with default settings. Always check the import options: ensure “Create optimized media” is unchecked (unless you have a specific reason, like very old, incompatible codecs) and “Create proxy media” is checked for 4K+ footage. This is critical for smooth editing on most machines.
“According to McKinsey, companies that excel at personalization — a direct output of disciplined optimization — generate 40% more revenue than average players.”
3. Leverage Proxy Media for Seamless Editing
This is where many editors, especially those transitioning from other NLEs, stumble. Editing high-resolution footage (4K, 6K, 8K) can bring even powerful Macs to their knees. Final Cut Pro’s Proxy Media feature is your best friend here, and frankly, it’s superior to many other proxy workflows I’ve encountered. It allows you to edit with lower-resolution, easily processed files while retaining the quality of your original media for export.
During import, as mentioned, check “Create proxy media.” If you forgot or need to generate proxies later, simply select the clips in your browser, right-click, and choose “Transcode Media > Create Proxy Media.” Once generated, go to the Viewer menu (the dropdown top-right of your viewer window) and select “Proxy Preferred” or “Proxy Only.” This tells Final Cut Pro to use the proxy files for playback. Your editing will be incredibly smooth, even with complex effects.
I cannot stress this enough: for any project involving 4K or higher resolution footage, always use proxies. We produce numerous product demonstration videos for our e-commerce clients, often shot in 6K. Without proxies, those edits would be an exercise in patience-testing frustration. With them, it’s fluid, allowing us to focus on the creative message rather than technical hiccups.
4. Master Roles for Efficient Audio Management and Export
Audio is often an afterthought in video marketing, but it shouldn’t be. Poor audio quality or an imbalanced mix can instantly cheapen your brand message. Final Cut Pro’s Roles feature is a powerful, often underutilized tool for organizing, mixing, and exporting audio components with precision.
Instead of relying on track numbers, assign roles to your audio clips. Go to the Inspector (Cmd+4), select an audio clip, and under the “Audio” tab, assign a role. I always use a standard set: “Dialogue” for spoken words, “Music” for background tracks, and “SFX” (Sound Effects) for everything else. You can even create custom sub-roles, like “Voiceover” under “Dialogue.”
This organizational method truly shines during the mixing phase. In the Timeline Index (Cmd+Shift+2), click the “Roles” tab. Here, you can instantly see all clips assigned to each role. You can solo, mute, or adjust the volume of entire roles with a single click. This is incredibly helpful when a client asks, “Can you just bring down the music a touch?” or “Is the voiceover clear enough?” Instead of hunting for individual clips, you adjust the “Music” role’s volume. When exporting, you can even choose to export specific roles as separate audio files, which is invaluable for sending stems to an audio engineer or for creating different language versions of your video.
Pro Tip: Custom Roles for Client Feedback
For complex marketing campaigns involving multiple stakeholders, I sometimes create custom roles like “Client_Review_Notes” and apply them to temporary text or audio annotations. This helps keep feedback organized within the project file, though I usually move final feedback to a dedicated project management platform.
5. Optimize Your Export Settings for Marketing Distribution
The final step, exporting, is where your hard work becomes a deliverable. Incorrect export settings can lead to bloated file sizes, poor playback quality, or even rejection by advertising platforms. My rule of thumb: always export specifically for the intended platform.
For general web distribution and social media (YouTube, LinkedIn, Instagram, Facebook), I almost exclusively use the “Computer” export setting (File > Share > Computer). This provides excellent quality-to-file-size ratio. Within the settings, choose “Format: H.264”. For resolution, 1080p (1920×1080) is sufficient for most marketing videos. If the original footage and platform support it, 4K (3840×2160) can be used, but be mindful of increased file size and upload times. For color space, ensure it’s set to “Rec. 709” unless you’re working with HDR content for specific displays. Frame rate should match your project settings, typically 23.98p, 25p, or 29.97p.
For more specific platform requirements, like Google Ads video campaigns or Meta’s Advantage+ Creative, always consult their latest specifications. According to IAB’s Digital Video Ad Spending Report 2025, advertisers are increasingly prioritizing platform-specific video optimization for engagement. For instance, Instagram Stories often require vertical video (9:16 aspect ratio), which means you’ll need to create a separate project or use the “Smart Conform” feature in Final Cut Pro to reframe your existing sequence.
Common Mistake: Exporting ProRes for Web
I’ve seen junior editors export a full ProRes 422 HQ file for a YouTube upload. While ProRes is fantastic for intermediate steps and archiving, it creates massive files utterly unsuitable for web streaming. Always use a highly compressed codec like H.264 or HEVC for final web distribution.
Case Study: “The Urban Explorer” Campaign
Just last year, we worked on “The Urban Explorer” campaign for a major outdoor gear retailer based out of the Ponce City Market area in Atlanta, specifically targeting the active lifestyle demographic in the Southeast. The client wanted a series of short, punchy videos for various social platforms, showcasing their new line of lightweight backpacks. We shot everything on a Sony a7S III in 4K at 60fps, generating significant file sizes.
Our approach was rigorous:
- System Prep: We used a Mac Studio M2 Max with 64GB RAM and a 4TB external Samsung T9 SSD for media and cache.
- Organization: The main library was “OutdoorGear_UrbanExplorer_2025.” Events were broken down by shoot location (e.g., “PiedmontPark_Shoot,” “BeltLine_B-Roll”). Projects included “UE_MainPromo_V1,” “UE_InstagramReel_V1,” “UE_TikTokShort_V1.”
- Proxy Workflow: All 4K footage was imported with “Create Proxy Media” checked. Editing was done in Proxy Preferred mode, ensuring buttery-smooth playback even with multiple layers of effects and color grading. This saved us an estimated 15-20 hours of rendering and waiting time over the course of the project.
- Audio Roles: Dialogue, Music (licensed from Epidemic Sound), and SFX were meticulously assigned roles. This allowed us to quickly adjust the mix for different platform requirements – for example, reducing music levels significantly for Instagram Reels where viewers often watch without sound initially.
- Targeted Exports: Each video was exported specifically for its destination. The YouTube main promo was 4K H.264 at 29.97fps. Instagram Reels were 1080×1920 H.264. TikTok shorts were also 1080×1920 but with a slightly higher bitrate to account for TikTok’s aggressive compression.
The result? The campaign saw a 28% increase in engagement across social channels compared to their previous efforts, with the client specifically praising the crisp visuals and clear audio. This success was a direct outcome of our disciplined Final Cut Pro workflow. For more on maximizing your video ad ROI, check out our guide to precision marketing.
Mastering Final Cut Pro for marketing isn’t just about knowing where the buttons are; it’s about implementing a disciplined, efficient workflow that saves time, reduces frustration, and ultimately delivers a superior product. By following these practical steps, you’ll not only produce higher quality video content but also streamline your entire post-production process, ensuring your marketing messages resonate clearly and effectively with your audience. It’s about working smarter, not just harder. If you’re struggling to get your message across, consider how marketers lose organic reach and how to survive in 2026.
What’s the ideal Mac hardware configuration for professional Final Cut Pro editing in 2026?
For professional Final Cut Pro editing, especially with 4K+ footage, I recommend a Mac Studio or MacBook Pro with an M2 Max or M3 Max chip, at least 32GB of Unified Memory (64GB is better for complex projects), and a minimum of 1TB internal SSD storage. Always pair it with a fast external Thunderbolt 4 SSD for your media and libraries.
Should I use “Optimized Media” or “Proxy Media” for editing?
For most modern workflows, Proxy Media is the superior choice for smooth editing, especially with high-resolution footage. Optimized Media converts your footage to ProRes 422, which is high-quality but creates much larger files than proxies and still requires significant processing power. Proxies are smaller, easier to handle, and provide excellent performance without sacrificing final export quality.
How do I manage Final Cut Pro libraries and projects when collaborating with a team?
For team collaboration, I strongly advocate for a shared storage solution, such as a Synology NAS or a dedicated SAN, connected via 10 Gigabit Ethernet. Each editor should work on their own project file within a shared library, or even their own library linked to the shared media. Utilize a version control system (even simple file naming like “_V1,” “_V2,” “_ClientEdits”) and communicate constantly. Final Cut Pro also has built-in XML export/import for exchanging projects, which can be useful.
What’s the best way to back up my Final Cut Pro projects?
Regular backups are non-negotiable. I recommend a multi-pronged approach: Time Machine for your entire system, and for your Final Cut Pro libraries, either manually copy them to a separate external drive daily or use a cloud backup service that can handle large files. Also, within Final Cut Pro, go to File > Export XML periodically to create a project-only backup that can reconstruct your edit if your library becomes corrupted.
How can I ensure consistent color grading across different marketing videos?
To ensure color consistency, develop a set of custom LUTs (Look Up Tables) or color correction presets within Final Cut Pro. Apply these consistently across all clips or projects for a particular brand or campaign. Calibrate your display regularly using a hardware calibrator like a Datacolor SpyderX Pro. Also, always use the built-in scopes (Waveform, Vectorscope, Histogram) in Final Cut Pro to visually verify your color and luminance levels, rather than relying solely on your eyes.


