For marketing professionals, mastering Final Cut Pro isn’t just about editing; it’s about crafting compelling narratives that convert. The speed, efficiency, and collaborative features of this powerful software can significantly impact your campaign timelines and budget, especially when client demands are relentless. But how do you truly squeeze every ounce of performance and precision out of it?
Key Takeaways
- Implement a standardized Library and Project naming convention for quick asset retrieval, saving an average of 15-20 minutes per project setup.
- Utilize Proxy Media for all 4K and higher resolution projects to ensure smooth playback and editing on any Mac, reducing rendering wait times by up to 70%.
- Master Roles for audio and video to automatically organize your timeline, export specific elements, and prepare for color/sound passes with 90% greater efficiency.
- Regularly clear render files and optimize storage by going to File > Delete Generated Library Files > Delete Render Files > All, preventing slowdowns and disk space issues.
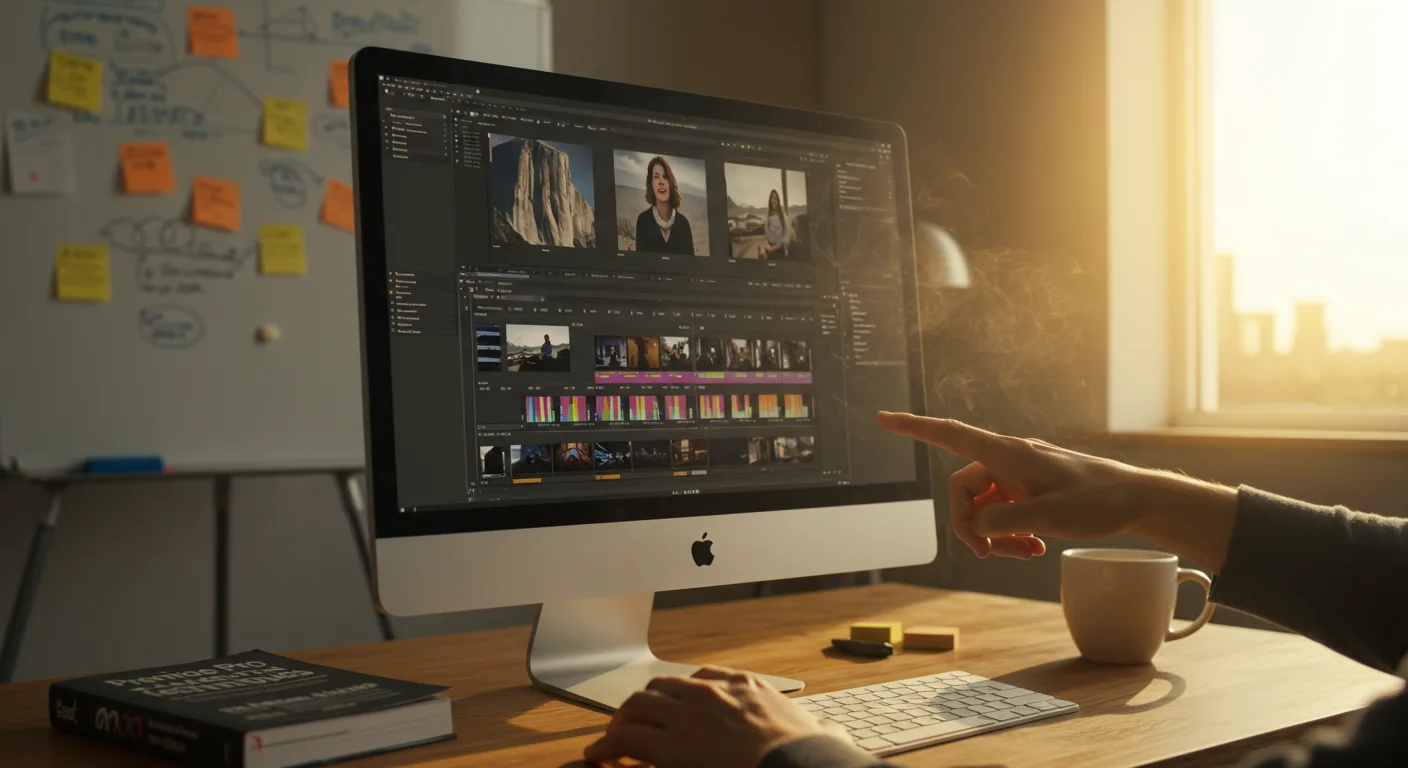
Step 1: Project Setup and Organization – The Foundation of Sanity
I’ve seen countless marketing teams stumble right out of the gate by neglecting proper project organization. It’s not just about neatness; it’s about speed and preventing catastrophic data loss or endless searching for assets. This is where your marketing campaign’s efficiency truly begins.
1.1 Create a New Library and Project with Precision
- Open Final Cut Pro. From the menu bar, go to File > New > Library.
- Name your Library using a consistent format. My preference, especially for agency work, is ClientName_CampaignName_Year (e.g., “AtlantaBrewery_SummerFest_2026”). Save it to your dedicated project drive, not your system drive. This is non-negotiable.
- Once the Library is created, right-click on it in the Libraries sidebar and select New Event. Name this after your specific shoot date or asset type (e.g., “ShootDay1_Broll” or “Graphics_V1”).
- Now, select your Event. Go to File > New > Project.
- In the “New Project” window, give your project a descriptive name: CampaignName_Deliverable_Version (e.g., “SummerFest_InstagramAd_V1”).
- Under “Video Properties,” select your desired resolution and frame rate. For most social media marketing, 1920×1080 (HD) at 29.97p or 23.98p remains standard, but always confirm client specs. If you’re delivering for vertical platforms, choose a custom resolution like 1080×1920.
- Leave “Render Format” as ProRes 422. It’s the optimal balance of quality and performance.
- Click OK.
Pro Tip: Don’t just dump all your media into one giant Event. Create separate Events for different types of assets: “Footage_Day1,” “Graphics,” “Music_SFX,” “VO_Dialogue.” This compartmentalization will save you hours during complex edits. I had a client last year whose entire campaign timeline was delayed by three days because their editor had all 2TB of raw footage, graphics, and audio in one Event. Imagine scrolling through that!
Common Mistake: Saving Libraries to your internal SSD. This fills up your system drive, slows down your Mac, and makes collaboration nearly impossible. Always use external, fast storage – ideally Thunderbolt-connected SSDs for 4K+ workflows.
Expected Outcome: A clearly structured Library with organized Events and a dedicated Project, ensuring that any team member can immediately understand the project hierarchy and locate assets. This alone can shave 10-15% off your initial setup time.
Step 2: Media Management and Ingest – Speed and Stability
Efficient media management is critical for fast turnaround times. You can’t edit what you can’t find, and you can’t edit smoothly if your system is choking on massive files.
2.1 Importing Media with Optimal Settings
- Select the appropriate Event in your Libraries sidebar where you want to import your media.
- Go to File > Import > Media (or use the shortcut Command + I).
- Navigate to your raw footage or asset folders.
- In the “Import Options” panel on the right, under “Files,” select Leave files in place. This is crucial for collaborative workflows and maintaining a clean source archive. Never copy to Library unless you’re working on a very small, self-contained project with no external assets.
- Under “Transcoding,” check Create proxy media. For any project involving 4K or higher resolution footage, this is a lifesaver. You edit with lightweight proxy files, and Final Cut Pro automatically switches to original media for export. It’s like magic, but it’s just good engineering.
- Under “Analyze and Fix,” uncheck everything unless you have a specific reason to analyze for stabilization or color balance. These can be done later and often slow down import unnecessarily.
- Click Import Selected.
Pro Tip: If you’re working with a lot of screen recordings or graphics (common in digital marketing), consider converting them to ProRes 422 before importing using Compressor. While Final Cut Pro handles many formats, ProRes is its native language, leading to snappier performance. This is especially true for variable frame rate footage from phones or screen capture tools.
Common Mistake: Forgetting to create proxy media. You’ll find yourself with stuttering playback, dropped frames, and endless frustration, especially on older Macs or when dealing with H.264/H.265 files from modern cameras. We ran into this exact issue at my previous firm when editing a high-energy product launch video shot on a RED camera; the 8K footage was unmanageable until we properly proxied everything.
Expected Outcome: All your media is imported, organized, and ready for efficient editing. Proxy media ensures smooth playback even on complex timelines, allowing you to focus on the creative, not the technical.
Step 3: Timeline Workflow and Editing Efficiency – The Art of Speed
This is where the rubber meets the road. Fast editing isn’t just about knowing shortcuts; it’s about structuring your timeline for maximum clarity and minimal rework.
3.1 Leveraging Roles for Superior Organization
- In the Browser (top left panel), select your clips. Right-click and choose Assign Roles.
- Final Cut Pro offers default roles like “Video,” “Titles,” “Dialogue,” “Music,” “Effects.” For marketing content, I strongly recommend creating custom roles.
- To create custom roles, go to Modify > Edit Roles (or press Command + 5 to open the Roles editor directly).
- Click the + button under “Video Roles” and add roles like “B-Roll,” “Product Shots,” “Client Logos,” “Call to Action.”
- Under “Audio Roles,” add “Voiceover,” “Sound Design,” “Jingle.”
- Assign these custom roles to your clips before dragging them to the timeline.
- Once on the timeline, open the Timeline Index (top left of timeline, looks like three lines). Click the “Roles” tab. Here, you can toggle visibility, solo roles, and rearrange their order for a clean, channel-like view.
Pro Tip: Use roles not just for organization but for targeted exports. Need an audio mix minus the music for client review? Just uncheck the “Music” role in the export settings. Need to send only the motion graphics to your animator for tweaks? Solo the “Graphics” role and export. This granular control is invaluable for iterative feedback loops common in marketing projects. It’s a massive time-saver for agencies dealing with multiple stakeholders.
Common Mistake: Ignoring roles completely. Your timeline becomes a chaotic mess of undifferentiated clips, making it impossible to quickly isolate dialogue, music, or graphics. When the client inevitably asks for “just a small tweak to the voiceover,” you’ll be digging through layers instead of simply soloing the “Voiceover” role.
Expected Outcome: A meticulously organized timeline where every element has its place. This clarity drastically reduces editing time, simplifies revisions, and streamlines the export process for various deliverables.
3.2 Mastering Keyboard Shortcuts and Skimming
- Familiarize yourself with core editing shortcuts:
- A for Select Tool
- B for Blade Tool
- T for Trim Tool
- P for Position Tool
- R for Range Selection Tool
- Z for Zoom Tool
- Command + B to Blade All
- Shift + Z to Fit to Window
- J, K, L for reverse, stop, and forward playback
- I and O for In and Out points
- Q for Connect Clip
- W for Insert Clip
- E for Append Clip
- D for Overwrite Clip
- Enable Skimming (the ‘S’ key toggles it) and Audio Skimming (Shift + S). This allows you to quickly scrub through footage and hear audio without needing to play the timeline.
- Use Command + Option + Arrow Keys to nudge clips frame by frame.
Pro Tip: Customize your keyboard shortcuts! Go to Final Cut Pro > Commands > Customize (Option + Command + K). I remapped my most frequent actions like adding markers and adjusting volume to keys closer to my left hand. This personalized setup can genuinely shave 10-15% off your editing time once muscle memory kicks in. Don’t be afraid to make the software work for you!
Common Mistake: Relying solely on mouse clicks. While intuitive for beginners, it’s agonizingly slow for professionals. Every mouse movement is a wasted second. Embrace the keyboard.
Expected Outcome: Fluid and rapid editing, allowing you to iterate on creative ideas faster and meet tight marketing deadlines without stress.
Step 4: Color Grading and Audio Mixing – Polishing for Impact
A well-edited video with poor color or audio is like a perfectly written ad copy with typos – it undermines your credibility. These steps are crucial for a professional marketing deliverable.
4.1 Professional Color Correction and Grading
- Select a clip in your timeline. Go to the Inspector (top right panel, looks like three sliders).
- Click the Color Inspector icon (the color wheel).
- Start with Color Wheels for primary correction: adjust “Master” for overall brightness/contrast, then “Shadows,” “Midtones,” and “Highlights” for specific ranges.
- Move to Color Board for saturation and exposure adjustments.
- For more nuanced work, use Color Curves and Hue/Saturation Curves. For instance, to make a product pop, you might increase the saturation of its specific color using a Hue vs. Sat curve.
- Apply a LUT (Look Up Table) if desired, but always apply it after primary correction. Go to the Effects Browser (bottom right, looks like two overlapping circles), search for “Custom LUT,” drag it to your clip, and then select your LUT from the Inspector.
Pro Tip: Consistency is king in marketing. Create a custom preset for your brand’s look. Once you’ve perfected a color grade on one clip, select it, go to the Inspector, click the “Save Effects Preset” button (a small plus sign next to “Video Effects”), and name it. Now you can apply this grade to all relevant clips with a single click. This ensures your brand identity is consistent across all video assets.
Common Mistake: Over-grading. Your marketing video shouldn’t look like a sci-fi movie unless that’s your brand aesthetic. Aim for natural, clean, and vibrant colors that enhance the product or message, not distract from it. A common pitfall is pushing saturation too far, leading to an artificial, cheap look.
Expected Outcome: Visually stunning marketing content that adheres to brand guidelines and captivates the audience, driving higher engagement rates.
4.2 Mastering Audio Mixing and Enhancement
- Select an audio clip or a video clip with embedded audio. Go to the Audio Inspector (looks like a speaker icon).
- Adjust the main volume using the fader. For dialogue, aim for peaks around -6dB to -3dB for broadcast readiness. Music and sound effects should sit lower.
- Add Compressor from the Effects Browser (under “Audio Effects > Dynamics”). Drag it to your audio clip. In the Inspector, adjust Threshold and Ratio to even out dynamic range, making voices more consistent.
- Use EQ (Equalizer) to clean up audio. Drag “Channel EQ” to your clip. Use it to cut out muddy low frequencies (around 100-200Hz) for dialogue or harsh high frequencies.
- For background noise reduction, use the built-in Noise Reduction effect. Drag it to your clip and adjust the “Amount” slider carefully.
- Utilize Audio Roles (as discussed in Step 3.1) to adjust entire categories of audio simultaneously. In the Timeline Index, click the “Roles” tab, then drag the volume slider next to an audio role to adjust all clips assigned to that role.
Pro Tip: Always mix with your ears, not just your eyes. Use quality headphones (not earbuds) and monitor on calibrated speakers if possible. Then, check your mix on different devices: a phone, a laptop, and a TV. This ensures your marketing message sounds good everywhere. According to a Nielsen report, poor audio quality is one of the top reasons viewers disengage from video content. Don’t let your brilliant visual campaign be undermined by muddy sound.
Common Mistake: Inconsistent audio levels. Nothing screams “amateur” louder than a video where the music is blasting one second and the voiceover is barely audible the next. This is a quick way to lose audience attention. Always ensure a smooth, balanced audio experience.
Expected Outcome: Crystal-clear, balanced audio that enhances your marketing message and keeps viewers engaged, reinforcing your brand’s professional image.
Step 5: Export and Archiving – Delivering and Preserving Your Work
You’ve poured your heart into the edit. Now, ensure your final product is delivered correctly and your project is safely archived for future revisions or repurposing.
5.1 Exporting for Various Marketing Platforms
- Once your project is complete, go to File > Share > Master File (or Command + E).
- In the “Settings” tab:
- Format: H.264 (for web/social media) or ProRes 422 (for broadcast/archival). For most marketing, H.264 is sufficient.
- Video Codec: Better Quality (H.264) or H.265 (HEVC) if the platform supports it and you need smaller file sizes.
- Resolution: Match your project settings (e.g., 1920×1080 or 1080×1920).
- Frame Rate: Match your project settings.
- Roles: This is where your earlier organization pays off! If you only want to export video and specific audio (e.g., Voiceover and Music, but not SFX), you can select those roles here.
- Click Next, choose your save location, and click Save.
Pro Tip: Don’t just export one master file. Create specific exports for each platform. For example, export a 1920×1080 H.264 for YouTube, a 1080×1920 H.264 for Instagram Reels/TikTok, and a square 1080×1080 H.264 for Facebook/LinkedIn feeds. Final Cut Pro’s “Share” menu offers direct presets for platforms like YouTube & Facebook, but customizing via “Master File” gives you more control. This multi-platform approach ensures your content is optimized for each channel, maximizing reach and engagement. According to a Statista report, digital video ad spending is projected to reach over $110 billion by 2027; optimizing for each platform is no longer optional.
Common Mistake: Exporting a single, large ProRes file and expecting social media platforms to handle it efficiently. They’ll re-compress it, often poorly, leading to a noticeable drop in quality. Always export H.264/H.265 tailored to platform specifications.
Expected Outcome: High-quality, optimized video files ready for immediate deployment across all your marketing channels, ensuring maximum visual fidelity and efficient delivery.
5.2 Archiving Your Project for Future Use
- Once your project is delivered, select your Library in the Libraries sidebar.
- Go to File > Delete Generated Library Files.
- Choose Delete Render Files > All and click OK. This frees up significant disk space.
- Go to File > Consolidate Library Files. Ensure “Media” is set to “In Library” and “Cache” is also set to “In Library.” This gathers all external media into your Library bundle, making it self-contained.
- Save the consolidated Library to your long-term archive storage (e.g., a network attached storage (NAS) or a dedicated external hard drive).
Pro Tip: Don’t just archive the Library; archive the raw footage too! Store your consolidated Final Cut Pro Library alongside the original camera media. This redundancy is essential. I’ve been burned by corrupted drives and missing source files more times than I care to admit. For a major client’s holiday campaign, we had to re-edit a 30-second spot from scratch because the original editor had only archived the FCP Library and the raw footage drive failed. The cost of that re-edit was astronomical.
Common Mistake: Not consolidating. If your Library references external media that later gets moved or deleted, your project will be full of “Missing File” errors. Always consolidate before archiving.
Expected Outcome: A lean, self-contained Final Cut Pro Library that can be easily retrieved, opened, and modified years down the line, ensuring your marketing assets remain accessible and reusable.
Mastering Final Cut Pro is an ongoing journey, but by consistently applying these best practices, marketing professionals can significantly enhance their video production workflow. The result is not just faster editing, but higher quality deliverables that truly resonate with target audiences and drive measurable results. Invest the time now; your future self, and your clients, will thank you.
What is the ideal frame rate for marketing videos on social media in 2026?
For most social media marketing videos, 29.97 frames per second (NTSC) or 25 frames per second (PAL) remain the industry standard. While higher frame rates like 60fps offer smoother motion, they often result in larger file sizes and aren’t always necessary for typical marketing content, which prioritizes quick consumption and accessibility. Always check specific platform recommendations.
Should I use “Copy to Library” or “Leave files in place” when importing media?
For professional marketing workflows, you should almost always choose “Leave files in place.” This keeps your original media organized in your designated project folders, prevents your Final Cut Pro Library from becoming excessively large, and makes collaborative editing and archival much simpler. “Copy to Library” is generally only suitable for very small, self-contained projects or when you specifically need all media bundled within the Library for portability.
How often should I clear render files in Final Cut Pro?
You should clear render files periodically during a long project and always before archiving. Render files take up significant disk space and can sometimes cause performance issues if they become corrupted or too numerous. Go to File > Delete Generated Library Files > Delete Render Files > All to keep your Library lean and your system running smoothly. There’s no fixed schedule, but if you notice slowdowns or warnings about disk space, clearing renders is a good first step.
Is it better to do color grading in Final Cut Pro or a dedicated color grading application?
For most marketing videos, Final Cut Pro’s built-in color tools are more than sufficient to achieve a professional look. Its Color Wheels, Color Board, and Curves offer powerful and intuitive control. Dedicated applications like DaVinci Resolve are typically reserved for high-end broadcast, feature film, or highly specialized commercial projects where extreme precision and complex grading nodes are required. For efficient marketing production, stick with Final Cut Pro to avoid round-tripping and save time.
Can Final Cut Pro handle collaborative editing for marketing teams?
Yes, Final Cut Pro is designed for collaborative workflows, especially with its Library-based structure. By keeping media external (“Leave files in place”) and sharing Libraries on a fast network storage solution (like a NAS or shared SAN), multiple editors can work on different projects within the same Library or even different sections of the same project. Apple’s focus on performance and project integrity makes it a strong contender for team environments, particularly for agencies and in-house marketing departments.


