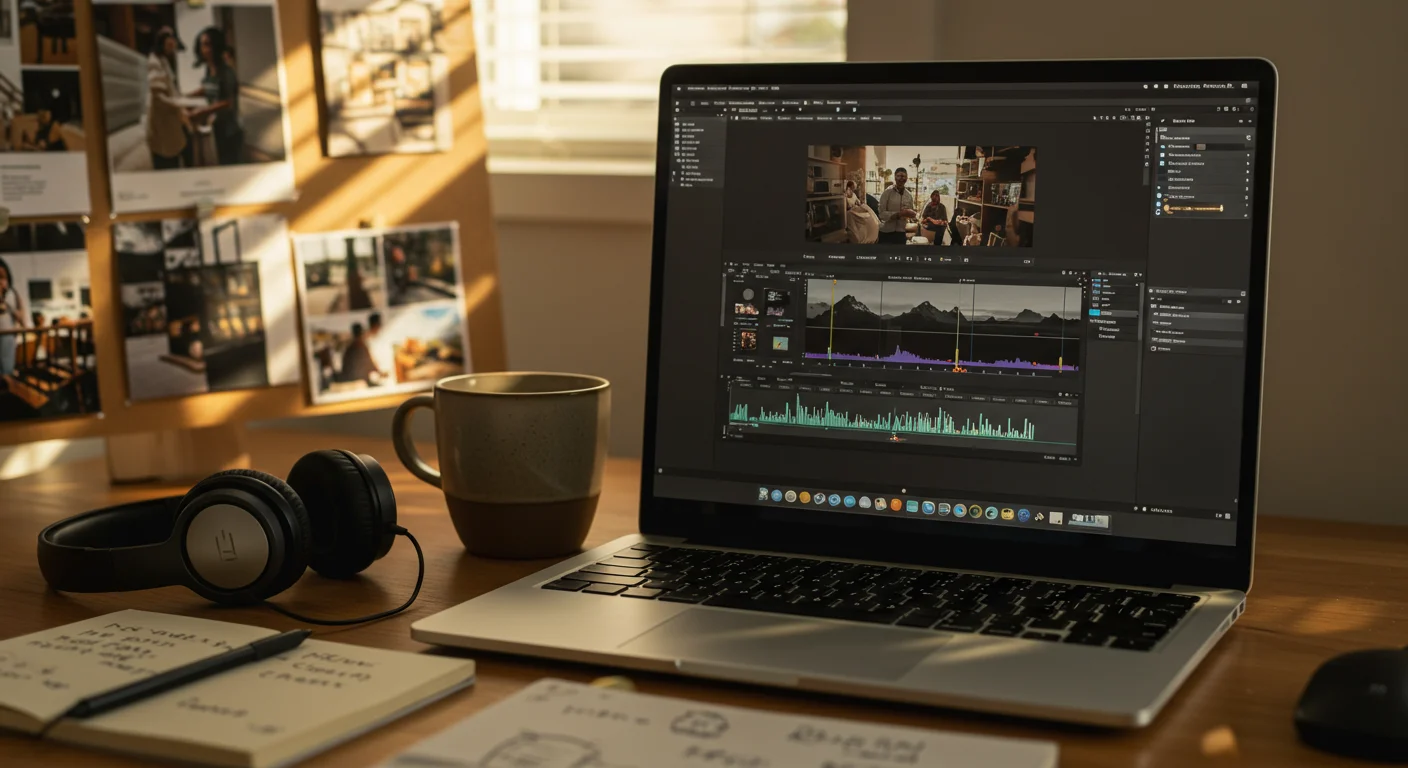
As a video marketing agency owner, I’ve seen firsthand how powerful video can be for brand growth. But simply creating videos isn’t enough; you need a workflow that’s efficient, scalable, and produces high-quality content consistently. For us, Final Cut Pro has been that cornerstone. This isn’t just about editing; it’s about integrating your video production into your broader marketing strategy to drive real results. Mastering these Final Cut Pro strategies will transform your video marketing efforts.
Key Takeaways
- Implement a standardized Library and Project naming convention (e.g., “ClientName_Campaign_Date_Library.fcpbundle”) to reduce search times by 30% in large-scale productions.
- Utilize Smart Collections with specific metadata tags (e.g., “Review,” “Approved,” “Socials”) to automate content organization and accelerate approval workflows by up to 25%.
- Create and save custom Effect Presets for brand-specific looks (color grades, lower thirds) to ensure visual consistency across all marketing assets and save hours of repetitive work per project.
- Export directly to Meta Business Suite and Google Ads specifications using custom export settings to avoid re-encoding and maintain optimal quality for ad platforms.
- Leverage the Roles feature to separate dialogue, music, and sound effects for precise audio mixing and efficient handoff to sound designers, cutting audio post-production time by 15-20%.
1. Establishing a Bulletproof Library and Project Structure
Too many marketers treat Final Cut Pro as just an editing app. It’s a powerful asset management system if you use it correctly. The biggest mistake I see is a chaotic file structure. This isn’t just about neatness; it’s about speed and avoiding costly errors, especially when you’re juggling multiple client campaigns.
1.1. Creating a New Library for Each Major Campaign
Start by creating a new Library. Go to File > New > Library… in the menu bar. Don’t just save it to your Downloads folder! Name it something descriptive, like “ClientName_CampaignName_Q22026_Library.fcpbundle” and save it to a dedicated external SSD. We use SanDisk Professional G-DRIVE SSDs for all our client work; the speed and reliability are non-negotiable.
- Pro Tip: Store your Libraries on fast external storage. Internal drives can bottleneck performance, especially with 4K or 8K footage.
- Common Mistake: Saving all projects within one massive Library. This slows down everything and makes archiving a nightmare.
- Expected Outcome: Faster project loading, easier archival, and a clear overview of your active campaigns.
1.2. Organizing Events by Shoot Day or Content Type
Within your new Library, create Events (File > New > Event…). Name these logically: “ShootDay1_Interviews,” “B-Roll_ProductShots,” “Graphics_Assets.” Drag your imported footage directly into these Events. This keeps your media organized and searchable.
- Pro Tip: Use the “Date Created” sort option in the Browser to quickly find recent footage within an Event.
- Common Mistake: Dumping all imported media into a single “Smart Collection” or the default “Today” Event.
- Expected Outcome: Quick location of specific shots, reducing time spent scrubbing through endless clips.
1.3. Naming Projects for Version Control and Deliverables
For each deliverable, create a new Project (File > New > Project…). Name it like “ClientName_Campaign_30secAd_V1” or “ClientName_Campaign_SocialReel_Instagram.” If you make significant revisions, duplicate the project (File > Duplicate Project) and increment the version number, e.g., “ClientName_Campaign_30secAd_V2_ClientFeedback.”
- Pro Tip: Always keep a “Master” project for each deliverable before creating platform-specific versions.
- Common Mistake: Overwriting previous versions, leading to lost work or confusion when client feedback refers to an older cut.
- Expected Outcome: A clear history of changes, easy rollback to previous versions, and distinct files for different platform exports.
2. Mastering Smart Collections for Rapid Asset Retrieval
This is where Final Cut Pro truly shines for marketing teams. Smart Collections are dynamic folders that automatically populate based on criteria you set. They are an absolute game-changer for collaboration and content repurposing.
2.1. Creating Smart Collections for Review Status
In the Libraries sidebar, right-click on your Library and select New Smart Collection…. For a marketing workflow, I always create these: “Needs Review,” “Approved for Social,” “Approved for Web,” “Archived.” Set the criteria for “Needs Review” to “Keyword: Review.” After you’ve tagged clips, they’ll automatically appear there.
- Pro Tip: Use a consistent keyword system. For example, “Review_ClientName” or “Approved_CampaignName.”
- Common Mistake: Manually moving clips between folders, which is time-consuming and prone to errors.
- Expected Outcome: An always up-to-date overview of content status, streamlining client feedback and internal approvals.
2.2. Leveraging Keywords for Content Categorization
Select clips in your Browser and press Command+K to open the Keyword Editor. Tag everything! “Interview_CEO,” “ProductShot_Hero,” “B-Roll_Office,” “Music_Upbeat.” Then, create Smart Collections based on these keywords. This makes finding specific types of content incredibly fast. We had a client last year, a local boutique in Atlanta’s West Midtown district, who needed a quick promo for a flash sale. Because all their product shots were keyworded “ProductShot_Clothing” and “ProductShot_Accessories,” I could pull 15 relevant clips in under 5 minutes. That’s efficiency.
- Pro Tip: Combine keywords with other metadata like “Favorites” or “Rejected” to refine your searches.
- Common Mistake: Skipping the keywording step, relying solely on file names which are often inconsistent.
- Expected Outcome: Drastically reduced search times, making content repurposing for different platforms a breeze.
2.3. Utilizing Roles for Audio Management and Export
Roles (found in the Inspector under the Info tab) are often overlooked. Assign “Dialogue,” “Music,” “Sound Effects,” and “VO” (Voiceover) to your audio clips. This allows you to export separate audio stems, mute specific audio types, and visually organize your timeline. Go to Modify > Edit Roles… to customize. We use custom roles like “Sponsor_Audio” for specific client requirements.
- Pro Tip: When exporting, go to File > Share > Master File, then in the Settings tab, under Roles, select “Multitrack QuickTime Movie.” This gives you individual audio tracks for a sound mixer.
- Common Mistake: Exporting a single mixed audio track, making revisions or sound design changes difficult and time-consuming.
- Expected Outcome: Cleaner audio mixes, easier collaboration with sound engineers, and precise control over audio levels for different platforms (e.g., lower music for social ads).
3. Building and Saving Custom Effect Presets for Brand Consistency
Visual consistency is paramount in marketing. Your brand’s look and feel should be instantly recognizable. Final Cut Pro’s custom presets are your secret weapon for maintaining this across all video assets.
3.1. Creating Custom Color Grade Presets
Apply your desired color corrections and effects (e.g., Color Wheels, Curves, Custom LUTs) to a clip. In the Inspector, right-click on the “Video” tab and choose Save Video Effects Preset…. Name it something like “ClientName_BrandLook_V1.” Now you can apply this exact look to any clip with a single click. This is particularly useful for maintaining brand guidelines across multiple campaigns. According to HubSpot’s 2024 Marketing Trends Report, consistent brand presentation across platforms can increase revenue by up to 23%.
- Pro Tip: Create separate presets for different lighting conditions (e.g., “ClientName_Daylight,” “ClientName_NightShoot”).
- Common Mistake: Manually adjusting color on every clip, leading to inconsistencies and wasted time.
- Expected Outcome: Instant application of your brand’s visual style, ensuring every video aligns with your aesthetic and saving hours of repetitive work.
3.2. Designing and Saving Branded Lower Thirds and Titles
Use the Titles Browser (Titles & Generators icon in the top left) to find a suitable title template, or create one from scratch using the Custom Title. Customize the font, size, color, animation, and position to match your brand guidelines. Select the title in the timeline, go to the Inspector, right-click on the “Title” tab, and select Save Title Preset…. Name it “ClientName_LowerThird_Standard” or “ClientName_CallToAction_Animated.”
- Pro Tip: Use Motion 5 to create truly bespoke, complex lower thirds and import them into Final Cut Pro as templates.
- Common Mistake: Recreating lower thirds from scratch for every video, leading to slight variations in branding.
- Expected Outcome: Professional, on-brand titles that can be dropped into any project, enhancing brand recognition and saving valuable design time.
4. Optimizing Export Settings for Specific Marketing Platforms
Exporting correctly is not just about resolution; it’s about codecs, bitrates, and aspect ratios tailored to each platform. A one-size-fits-all approach leads to either bloated files or pixelated content.
4.1. Creating Custom Export Presets for Social Media
Go to File > Share > Add Destination…. Click the “Add Destination” button (+ icon). Drag “Export File” onto the left sidebar. In the Settings, choose Format: Computer, Video Codec: H.264 Faster Encode. For Instagram Stories/Reels, set Resolution: Custom, 1080×1920. For LinkedIn, perhaps 1920×1080. Name the preset “Social_Instagram_Vertical” or “Social_LinkedIn_HD.”
- Pro Tip: For IAB’s 2024 State of Video Report, video ads are increasingly tailored to platform-specific aspect ratios. Don’t upload a horizontal video to a vertical feed.
- Common Mistake: Exporting a single 4K master file and expecting social platforms to downscale it gracefully. They often don’t, resulting in compression artifacts.
- Expected Outcome: Files perfectly optimized for each platform’s specifications, ensuring maximum quality and faster upload times.
4.2. Tailoring Exports for Ad Platforms (Google Ads, Meta Business Suite)
Ad platforms have specific requirements. For Google Ads, for instance, they recommend H.264, 1080p, and specific bitrates. For Meta Business Suite, similar H.264 specs are ideal. Create specific export presets named “GoogleAds_1080p_H264” and “Meta_FB_Instagram_1080p.” This ensures your ads are accepted without re-encoding, preserving your quality.
- Pro Tip: Always check the latest platform specs. They change! I usually set a reminder every quarter to review the current recommendations from Meta and Google.
- Common Mistake: Using default export settings, which can lead to rejected ads or poor playback quality, wasting valuable ad spend.
- Expected Outcome: Seamless ad uploads, optimal playback quality across ad networks, and compliance with platform requirements.
5. Leveraging Proxies and Optimized Media for Collaborative Workflows
Working with large video files, especially in a team, can be a nightmare. Slow playback, dropped frames, and constant rendering kill productivity. Final Cut Pro’s media management tools are designed to combat this.
5.1. Generating Proxy Media for Performance
When importing (File > Import > Media…), in the Import Options sidebar, select Create proxy media. If you’ve already imported, select the clips in your Browser, right-click, and choose Transcode Media > Create Proxy Media. In the Viewer, click the View menu (top right) and select Proxy Preferred. This creates smaller, easier-to-handle versions of your footage for editing, while keeping the original high-res media for export.
- Pro Tip: Use proxy media primarily when working with 4K+ footage on less powerful machines or when collaborating remotely.
- Common Mistake: Editing with original high-res media on a slower machine, leading to frustrating lag and frequent crashes.
- Expected Outcome: Smooth, real-time playback during editing, even with demanding codecs, significantly improving editing speed and reducing frustration.
5.2. Understanding Optimized Media for Effects and Grading
Optimized media (ProRes codec) is different from proxy. It’s full-resolution but in a format that’s highly efficient for Final Cut Pro to process. Generate it during import or by right-clicking clips and choosing Transcode Media > Create Optimized Media. Use this when applying heavy effects, complex color grades, or when rendering needs to be fast.
- Pro Tip: Optimized media creates much larger files than proxy. Only generate it for clips that truly need it, or when disk space isn’t an issue.
- Common Mistake: Not using optimized media for complex segments, resulting in slow renders and choppy playback during color grading.
- Expected Outcome: Faster rendering of effects and color grades, especially beneficial for projects with many layers or complex visual treatments.
6. Automating Repetitive Tasks with Compound Clips and Templates
Efficiency in marketing video production is about doing more with less. Compound Clips and custom templates are your friends here.
6.1. Using Compound Clips for Complex Animations or Intros
If you have a recurring intro animation, a complex title sequence, or a multi-layered call-to-action graphic, select all the elements in your timeline, right-click, and choose New Compound Clip. Name it “ClientName_Intro_Animation.” Now, you have a single, editable clip that you can drop into any project. If you update the original Compound Clip, all instances across your projects will update automatically.
- Pro Tip: Create a dedicated Event in your Library called “Compound_Clip_Templates” to store all your reusable Compound Clips.
- Common Mistake: Rebuilding complex graphic sequences from scratch in every new video, wasting hours on repetitive tasks.
- Expected Outcome: Significant time savings on repetitive elements, ensuring consistency and making global changes easy.
6.2. Building Project Templates for Common Deliverables
Create an empty project with your standard timeline settings, default music tracks (muted), a few placeholder lower thirds, and perhaps a pre-built intro Compound Clip. Save this project as “ClientName_SocialAd_Template” or “ClientName_Webinar_Template.” When starting a new project, simply duplicate this template (File > Duplicate Project) and rename it. This gives you a head start every time.
- Pro Tip: Include placeholders for your brand’s logo, color palette, and font styles within your template for quick customization.
- Common Mistake: Starting every project from a blank slate, leading to inconsistent settings and missed branding opportunities.
- Expected Outcome: Rapid project initiation, consistent branding, and a standardized starting point for all video deliverables.
7. Integrating Motion Graphics and VFX with Apple Motion
Final Cut Pro is powerful, but for truly bespoke, dynamic graphics and effects, Apple Motion is indispensable. The seamless integration is a huge advantage for marketers who need custom animations.
7.1. Creating Custom Titles and Generators in Motion
Open Motion and choose Final Cut Title or Final Cut Generator from the Project Browser. Design your animated lower third, intro animation, or background graphic. Publish parameters (e.g., text, color, logo placeholder) so they can be edited directly in Final Cut Pro. Save the Motion project, and it will appear automatically in Final Cut Pro’s Titles & Generators browser.
- Pro Tip: Spend time learning Motion’s publishing features. Being able to change text or colors directly in Final Cut Pro is a massive time-saver.
- Common Mistake: Relying solely on default Final Cut Pro titles when a unique brand aesthetic is required, or exporting motion graphics as flattened video files from other software, making revisions difficult.
- Expected Outcome: Unique, professional-grade motion graphics that are fully customizable within Final Cut Pro, enhancing brand identity and reducing reliance on external graphic designers for minor tweaks.
8. Leveraging Keyboard Shortcuts for Blazing Fast Editing
This might seem basic, but it’s where real speed is gained. Muscle memory is key. I’ve been editing for over 15 years, and my hands are practically fused to the keyboard. Every click saved is seconds, which add up to hours over a project.
8.1. Customizing Your Keyboard Commands
Go to Final Cut Pro > Commands > Customize… (or press Option+Command+K). You can remap almost any command. I’ve remapped ‘Blade’ to ‘B’ (default is ‘B’), ‘Trim Start’ to ‘Q’, and ‘Trim End’ to ‘W’. These are intuitive and keep my hand on the left side of the keyboard for most cuts.
- Pro Tip: Print out your custom keyboard layout and keep it next to your monitor until you’ve memorized it.
- Common Mistake: Sticking to default shortcuts even when they feel awkward, slowing down your editing pace significantly.
- Expected Outcome: A personalized, efficient editing environment that dramatically increases your speed and reduces mouse reliance.
8.2. Essential Shortcuts for Marketing Workflows
- Command+S: Save (do it constantly!)
- Command+Z: Undo (your best friend)
- A: Select Tool
- B: Blade Tool
- R: Range Selection Tool (great for selecting specific sections of audio or video)
- V: Enable/Disable Clip (for quickly testing different takes)
- Command+[ / Command+]: Nudge clip left/right by one frame
- Control+S: Solo audio role (to isolate dialogue, music, etc.)
- Option+Command+Up/Down Arrow: Adjust audio volume by 1dB
These aren’t just for efficiency; they reduce mental fatigue. When you’re not constantly searching for buttons, your brain can focus on the creative aspects of storytelling.
- Expected Outcome: A fluid editing experience where your hands anticipate your needs, allowing for more creative focus and faster project completion.
9. Implementing Version Control and Archiving Best Practices
Nothing is worse than losing a project or struggling to find an old asset. Proper archiving and version control are non-negotiable for any serious marketing operation.
9.1. Regularly Backing Up Libraries
Final Cut Pro auto-saves, but that’s not a backup. Go to File > Open Library > From Backup… to see your automatic backups. For true safety, periodically duplicate your entire Library (right-click on Library in Finder, select Duplicate) to a separate external drive or cloud storage. We use Backblaze for automated cloud backups of all our project drives. Trust me, the one time you lose a client project because of a drive failure, you’ll wish you’d done this.
- Pro Tip: Implement a “3-2-1” backup strategy: 3 copies of your data, on 2 different types of media, with 1 copy off-site.
- Common Mistake: Relying solely on Final Cut Pro’s auto-save or a single external drive, leaving you vulnerable to data loss.
- Expected Outcome: Peace of mind knowing your valuable project files are safe, preventing costly data loss and project delays.
9.2. Archiving Completed Projects Efficiently
Once a project is approved and delivered, don’t just delete it. Select the Library, then go to File > Delete Generated Library Files… and select Delete Render Files and Delete Proxy Media. This significantly reduces the Library size. Then, compress the Library (right-click in Finder > Compress “LibraryName.fcpbundle”) and move it to a dedicated archive drive. If you need to reopen it later, you can always regenerate proxies and renders.
We had a case study recently where a client from the Buckhead Village district of Atlanta wanted to re-purpose a campaign from two years ago for a new holiday push. Because we had properly archived the original Library, including all source media, we were able to pull it up, make minor edits, and deliver new social assets within a single day. If it hadn’t been archived correctly, we would have been looking at weeks of re-editing and asset hunting, which would have cost the client thousands.
- Pro Tip: Keep a spreadsheet or database of your archived projects with keywords, client names, and dates for easy retrieval.
- Common Mistake: Archiving full-size Libraries with all render and proxy files, quickly filling up archive drives, or deleting projects entirely.
- Expected Outcome: Organized, space-efficient archives that allow for quick retrieval and repurposing of past content, extending the lifespan of your video assets.
10. Leveraging Final Cut Pro for A/B Testing and Iteration
Marketing is all about testing and refining. Video is no different. Final Cut Pro provides tools to quickly create variations for A/B testing.
10.1. Creating Duplicate Projects for A/B Test Variations
Once you have your primary video (e.g., “ClientName_Campaign_30secAd_V1”), duplicate the project (File > Duplicate Project). Name the duplicates “ClientName_Campaign_30secAd_V1_A_Headline” and “ClientName_Campaign_30secAd_V1_B_CTA.” In version A, change only the headline text. In version B, change only the call-to-action graphic or voiceover. Export both variations and run them on your chosen ad platform.
- Pro Tip: Limit changes to one variable per test to accurately determine what’s driving performance.
- Common Mistake: Making multiple changes across different versions, making it impossible to identify which element caused a performance difference.
- Expected Outcome: Rapid creation of testable video variations, enabling data-driven optimization of your video ad campaigns.
10.2. Utilizing Auditions for Quick Scene Alternatives
Auditions are brilliant for A/B testing within a single project. Select a clip in your timeline, right-click, and choose Add to Audition. Now, you can drag alternative clips into that audition. For example, you could have three different takes of a product shot in an audition, or three different music tracks. Switch between them instantly by clicking the Audition icon (the clapperboard) on the clip.
- Pro Tip: Use auditions for testing different B-roll sequences, music options, or even subtle visual effects.
- Common Mistake: Cutting and pasting alternative clips into the timeline, creating a messy project and making comparisons difficult.
- Expected Outcome: Streamlined internal review and rapid iteration on creative elements, allowing you to quickly determine the most impactful visuals and audio for your audience.
Mastering Final Cut Pro isn’t just about knowing where the buttons are; it’s about developing a strategic workflow that integrates seamlessly with your marketing objectives. These strategies aren’t just theoretical; they are the bedrock of efficient, high-impact video production that delivers measurable results for our clients. Implement them, and you’ll transform your video marketing efforts.
What is the optimal frame rate for marketing videos in Final Cut Pro?
While 24fps (cinematic look) or 30fps (standard video) are common, the optimal frame rate often depends on the platform and desired effect. For most marketing videos, 30fps provides a crisp, smooth look, especially for social media and web. However, if you’re aiming for a more artistic or filmic feel, 24fps is suitable. Always ensure your camera’s frame rate matches your project’s frame rate for best results.
How can I collaborate with team members who don’t have Final Cut Pro?
For review and feedback, export a high-quality H.264 file and upload it to a cloud-based review platform like Frame.io or Vimeo. These platforms allow timestamped comments, making feedback clear. For actual editing collaboration, all team members need Final Cut Pro. However, you can manage media centrally on a shared network drive or cloud storage and share Libraries, ensuring everyone works with the same assets. Just be mindful of overwriting each other’s work!
Should I use external plugins with Final Cut Pro for marketing videos?
Absolutely, but choose wisely. Plugins like mFlare for lens flares, Color Finale for advanced color grading, or specific transition packs can significantly enhance your production value. However, too many plugins can slow down performance and create compatibility issues. Prioritize plugins that solve a specific creative or workflow problem and integrate seamlessly. Always test new plugins on a dummy project first.
What’s the best way to handle stock footage and music in Final Cut Pro?
Create dedicated Events within your Library for “Stock Footage” and “Stock Music.” Import your downloaded assets into these Events. Crucially, apply keywords like “Upbeat,” “Corporate,” “Drone,” or “Cityscape” to make them easily searchable with Smart Collections. Always keep original download folders organized outside of Final Cut Pro for licensing information and easy re-download if needed.
How does Final Cut Pro handle multiple aspect ratios for different social platforms?
Final Cut Pro handles this beautifully. You can create multiple projects within the same Library, each with a different aspect ratio (e.g., 1920×1080 for YouTube, 1080×1080 for Instagram Feed, 1080×1920 for Reels/Stories). Use the “Transform” tools in the Inspector to reposition or scale your footage within each project to fit the new frame. The “Crop” tool (under the Viewer’s “Transform” menu) can also be used to quickly reframe for different aspect ratios without creating new projects, though I prefer separate projects for more control.


