Mastering Adobe Premiere Pro is non-negotiable for any marketer serious about video content in 2026. This isn’t just about cutting clips; it’s about crafting narratives that convert, and the right tutorials on video editing software can transform a novice into a persuasive storyteller. Ready to stop outsourcing and start owning your video marketing?
Key Takeaways
- Learn to import and organize media within Premiere Pro’s Project Panel, establishing a foundational workflow for efficient editing.
- Master basic timeline editing, including precise cuts, transitions, and audio adjustments, to create a coherent video sequence.
- Apply essential color correction and grading techniques using Lumetri Color to achieve a professional and consistent visual aesthetic.
- Integrate dynamic text and motion graphics using the Essential Graphics panel to enhance viewer engagement and convey key messages.
- Export your final marketing video with optimal settings for various platforms, ensuring high quality and efficient delivery.
As a marketing director who’s seen the industry shift dramatically towards video-first strategies, I can tell you firsthand: if you’re not producing compelling video, you’re losing market share. According to a recent IAB report, digital video ad spend surged by 22% in the first half of 2025 alone. That’s a massive indicator of where consumer attention lies. We used to rely heavily on our agency for every video, but that became unsustainable, both financially and in terms of agility. That’s why I mandated our team get proficient with Premiere Pro.
Setting Up Your Project and Importing Media
The foundation of any successful video project lies in proper organization. Skip this, and you’ll spend more time searching for assets than actually editing.
1. Create a New Project
When you first open Adobe Premiere Pro 2026, you’ll be greeted by the Home screen. Look for the large blue button labeled “New Project” on the left-hand side. Click it. In the “New Project” dialog box, give your project a descriptive name, something like “Q3 Marketing Campaign – Product Launch.” For the “Location,” I always recommend creating a dedicated folder on your fastest drive (an NVMe SSD is ideal) for each project. Click “Browse…” next to the Location field and select your desired folder. Under “General,” leave the default settings unless you have specific reasons to change them. Click “Create.”
Pro Tip: Resist the urge to save projects on network drives during active editing. Local storage is significantly faster and prevents frustrating lag or crashes. Once the project is complete, then you can archive it to a network location.
Common Mistake: Not creating a dedicated project folder. This leads to media scattered across your hard drive, making it impossible to archive or transfer projects cleanly.
Expected Outcome: An empty Premiere Pro workspace, ready for media, with your project file (.prproj) saved in its designated location.
2. Import Your Marketing Assets
Now that your project is set up, it’s time to bring in your video footage, images, and audio files. There are a few ways to do this, but I prefer the most organized approach.
- Using the Project Panel: In the bottom-left corner of the Premiere Pro interface, you’ll find the Project Panel. Double-click anywhere within this panel’s empty space. A standard file explorer window will pop up. Navigate to the folder containing your media. Select all the files you need (Ctrl+A on Windows, Cmd+A on Mac) and click “Import.”
- Creating Bins for Organization: This is where true efficiency comes in. Right-click within the Project Panel and select “New Bin.” Name this bin something like “Video Footage,” “Images,” “Audio Tracks,” or “Graphics.” Drag and drop your imported media into these respective bins. This keeps your project panel clean and easy to navigate, especially for larger campaigns with hundreds of assets.
Pro Tip: For large projects, consider creating sub-bins. For example, within “Video Footage,” you might have “A-Roll,” “B-Roll,” and “Interviews.” This level of detail saves hours later on. I had a client last year, a local Atlanta startup called “Piedmont Tech Solutions,” who initially dumped all their footage into one bin. The subsequent edit took twice as long because we were constantly scrubbing through irrelevant clips. Never again.
Common Mistake: Importing everything into the root of the Project Panel. It quickly becomes a chaotic mess, making it difficult to find specific clips and increasing the risk of using the wrong asset.
Expected Outcome: All your marketing assets are neatly organized into logical bins within the Project Panel, ready for editing.
Basic Timeline Editing: Crafting Your Narrative
The timeline is where your story comes to life. This is where you assemble, trim, and arrange your clips.
1. Creating a Sequence
A sequence is essentially your canvas. Right-click on one of your primary video clips in the Project Panel and select “New Sequence From Clip.” Premiere Pro will automatically create a sequence matching the resolution, frame rate, and audio settings of that clip. This is the fastest and most reliable way to start.
Pro Tip: If you need specific sequence settings (e.g., for a vertical video ad on Instagram Reels), go to File > New > Sequence… (or Ctrl+N/Cmd+N). In the “New Sequence” dialog, navigate to Settings, and you can manually adjust “Frame Size” (e.g., 1080 horizontal, 1920 vertical) and “Frame Rate.”
Common Mistake: Manually setting up a sequence with incorrect settings, leading to resolution issues or choppy playback. Always “New Sequence From Clip” first, then adjust if necessary.
Expected Outcome: A new sequence appears in your Project Panel and automatically opens in the Timeline Panel, ready for editing.
2. Assembling Your Rough Cut
Now, drag your clips from the Project Panel onto the newly created sequence in the Timeline Panel. Arrange them in the order you envision your story unfolding. Don’t worry about perfect cuts yet; focus on the flow.
- Adding Clips: Simply click and drag a video clip from the Project Panel onto the Video 1 (V1) track in your timeline. For audio, drag it onto Audio 1 (A1).
- Rearranging Clips: Click and drag clips on the timeline to change their order. Premiere Pro will automatically snap them together if “Snapping” is enabled (the magnet icon in the timeline toolbar).
- Basic Trimming: Hover your mouse over the edge of a clip on the timeline. Your cursor will turn into a red bracket. Click and drag inwards to trim the beginning or end of a clip.
Pro Tip: Use the Source Monitor (top-left panel) to preview clips before adding them to the timeline. Double-click a clip in the Project Panel to open it in the Source Monitor. Use the “Mark In” (I) and “Mark Out” (O) buttons to select specific portions of a clip, then drag just that selected portion to the timeline. This is incredibly efficient.
Common Mistake: Dragging entire, unedited clips to the timeline and then trying to trim them extensively. This clutters the timeline and can make fine-tuning more difficult.
Expected Outcome: A rough assembly of your video clips, forming the basic structure of your marketing message.
3. Refining Cuts and Adding Transitions
This is where your video starts to feel polished. Precision is key here.
- Razor Tool (C): Select the Razor Tool from the toolbar (or press ‘C’ on your keyboard). Click on a clip in the timeline to make a cut. This is useful for removing mistakes or splitting a long clip into manageable segments.
- Selection Tool (V): After making a cut, switch back to the Selection Tool (V) to select the unwanted portion and press Delete.
- Ripple Delete: To remove a gap created by deleting a clip and automatically close the space, right-click on the gap and select “Ripple Delete.” This is a massive time-saver.
- Applying Transitions: Go to the Effects Panel (typically grouped with the Project Panel). Expand “Video Transitions.” Drag a transition (e.g., “Cross Dissolve” from the “Dissolve” folder) onto the cut between two clips. You can adjust its duration by dragging its edges on the timeline.
Pro Tip: Don’t overdo transitions. A simple cross dissolve or a clean cut is often more professional for marketing content than flashy wipes or pushes. We ran into this exact issue at my previous firm, “Peach State Digital,” where a junior editor loaded up a client’s promo video with every transition imaginable. It looked amateurish and distracted from the product. Less is often more.
Common Mistake: Using too many different or overly complex transitions. This makes the video feel disjointed and unprofessional.
Expected Outcome: A smoothly flowing video with precise cuts and subtle, effective transitions.
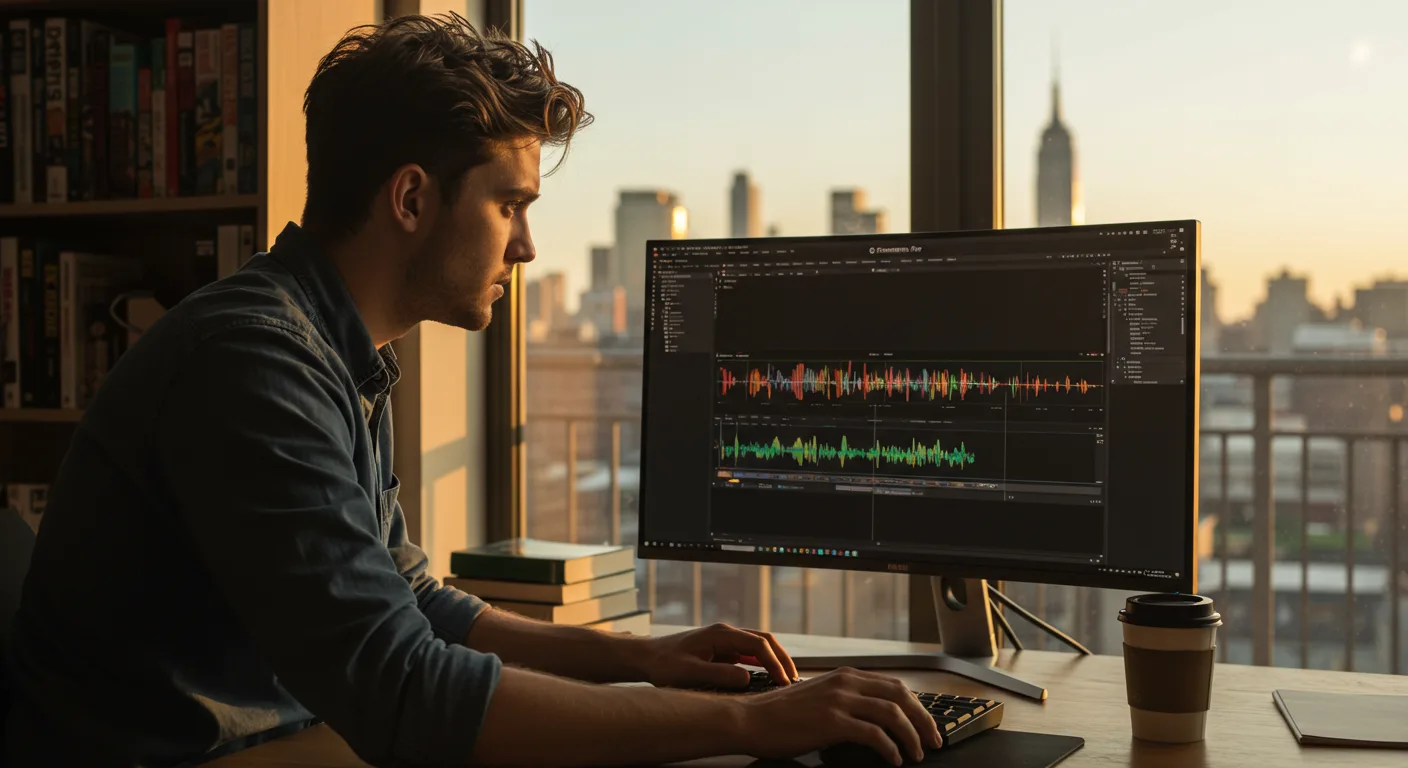
Audio Enhancement and Mixing
Good audio is often more important than good video. Poor audio will instantly turn viewers away.
1. Adjusting Audio Levels
Every clip needs its audio level checked and adjusted for consistency.
- Audio Track Mixer: Go to Window > Audio Track Mixer > [Your Sequence Name]. This panel gives you faders for each audio track (A1, A2, etc.).
- Clip Volume: Alternatively, you can adjust individual clip volume. Right-click on an audio clip in the timeline and select “Audio Gain…” (or press G). You can “Set Gain to:” a specific dB value or “Normalize Max Peak to:” for quick leveling.
- Keyframing Volume: For more precise control, expand the audio track on the timeline (click the small triangle next to the track name). You’ll see a white line representing volume. Click the Pen Tool (P), then click on this line to add keyframes. Drag keyframes up or down to adjust volume at specific points, creating fades or ducking background music.
Pro Tip: Aim for dialogue to peak around -6dB to -3dB on the audio meters (visible in the Audio Track Mixer). Background music should sit much lower, typically -20dB to -15dB, so it doesn’t overpower the voiceover or primary audio. This ensures clarity and professionalism.
Common Mistake: Inconsistent audio levels, where one clip is too loud and the next is too quiet. This is jarring for the viewer and makes your content feel unpolished.
Expected Outcome: Balanced and clear audio throughout your video, with no sudden loud spikes or inaudible sections.
2. Applying Audio Effects (Optional but Recommended)
Basic audio effects can significantly improve sound quality.
- Essential Sound Panel: Select an audio clip on your timeline. Go to Window > Essential Sound. This panel offers quick presets. For dialogue, select the “Dialogue” tag. You’ll see options for “Loudness,” “Repair” (for noise reduction), and “Clarity.”
- Parametric Equalizer: For more control, go to the Effects Panel, search for “Parametric Equalizer,” and drag it onto your audio clip. In the Effect Controls Panel (usually top-left), click “Edit…” next to the Parametric Equalizer effect. You can boost or cut specific frequencies to improve voice clarity or remove muddiness.
Pro Tip: The “Reduce Noise” and “Reduce Reverb” sliders in the Essential Sound Panel are surprisingly effective for cleaning up less-than-perfect recordings. Don’t underestimate their power for quick fixes!
Common Mistake: Ignoring poor audio quality altogether. Viewers will tolerate mediocre video but rarely tolerate poor audio.
Expected Outcome: Cleaner, more professional-sounding audio that enhances the overall viewing experience.
Color Correction and Grading: Visual Polish
Color can evoke emotion and brand identity. Don’t skip this step.
1. Basic Color Correction with Lumetri Color
This is where you fix exposure and white balance issues.
- Lumetri Color Panel: Select a video clip on your timeline. Go to Window > Lumetri Color.
- Basic Correction Tab: In the Lumetri Color panel, expand the “Basic Correction” tab.
- White Balance: Use the Eyedropper Tool next to “White Balance” and click on something in your video that should be neutral gray or white. This instantly corrects color casts.
- Exposure & Contrast: Adjust the “Exposure” slider to brighten or darken your image. Use “Contrast” to enhance the difference between light and dark areas.
- Highlights, Shadows, Whites, Blacks: These sliders offer finer control over specific tonal ranges.
Pro Tip: Always do your color correction on a calibrated monitor if possible. What looks good on your laptop might look terrible on another screen. For quick checks, I often bounce between my primary monitor and a secondary, less accurate display, just to get a sense of how it’ll look to the average viewer.
Common Mistake: Not correcting white balance, leading to footage with an unnatural color tint (e.g., too blue or too orange).
Expected Outcome: Visually balanced footage with accurate colors and appropriate exposure.
2. Creative Color Grading
This is where you add stylistic flair and a consistent look across your marketing videos.
- Creative Tab: Still in the Lumetri Color panel, expand the “Creative” tab.
- Look (LUTs): Premiere Pro includes several built-in “Looks” (LUTs – Look Up Tables) that can instantly change the mood of your footage. Experiment with these, or import custom LUTs often provided by stock footage sites or colorists.
- Saturation & Vibrance: Adjust “Saturation” to make colors more intense or muted. “Vibrance” is a smarter saturation tool that primarily affects less saturated colors, preventing skin tones from looking over-processed.
Pro Tip: Maintain a consistent color grade across all your marketing videos. This builds brand recognition. If your brand uses specific colors, try to subtly enhance them in your grading. This is a subtle but powerful psychological trick.
Common Mistake: Over-grading, making the footage look unnatural or overly stylized. Subtlety is often more effective in marketing.
Expected Outcome: A consistent and branded visual style across all your video clips.
Adding Text and Motion Graphics
Text is essential for calls to action, lower thirds, and important information.
1. Using the Essential Graphics Panel
This panel makes adding and customizing text incredibly intuitive.
- Open Essential Graphics: Go to Window > Essential Graphics.
- Add New Layer: In the Essential Graphics panel, click the “New Layer” icon (a square with a plus sign) and select “Text.”
- Type Your Text: A text box will appear in your Program Monitor (top-right panel). Double-click it and type your desired text (e.g., “Visit Our Website!”).
- Customize Text: Back in the Essential Graphics panel, under the “Edit” tab, you’ll find options to change font, size, color, alignment, add shadows, and more.
- Positioning: Drag the text box directly in the Program Monitor to position it, or use the “Position” controls in the Essential Graphics panel.
Pro Tip: Ensure your text is readable! Choose clear fonts, good contrast against the background, and don’t make it too small. For marketing videos, clarity trumps artistic flair every time. Also, consider “safe margins” for text to ensure it’s visible on different screens and platforms. You can enable these by clicking the wrench icon in the Program Monitor and selecting “Safe Margins.”
Common Mistake: Using unreadable fonts or colors that blend into the background. Your call to action won’t convert if no one can read it.
Expected Outcome: Clearly legible text overlays conveying key marketing messages or calls to action.
2. Incorporating Motion Graphics Templates (MOGRTs)
MOGRTs are pre-animated graphics that save massive amounts of time.
- Browse MOGRTs: In the Essential Graphics panel, switch to the “Browse” tab. You’ll see a library of installed MOGRTs (often included with Premiere Pro or Creative Cloud subscriptions).
- Drag to Timeline: Find a suitable MOGRT (e.g., a lower third or an animated title) and drag it directly onto a video track above your main footage.
- Customize: Select the MOGRT on your timeline, then switch back to the “Edit” tab in the Essential Graphics panel. You’ll find customizable parameters like text fields, colors, and animation options.
Pro Tip: Invest in a good MOGRT pack if you produce a lot of video. Sites like Envato Elements offer thousands of professional templates for a subscription. This allows you to produce high-quality, branded animations without needing to learn After Effects.
Common Mistake: Trying to animate complex graphics from scratch in Premiere Pro. While possible, it’s inefficient for marketers. MOGRTs are your friend.
Expected Outcome: Dynamic, branded motion graphics that add polish and professionalism to your marketing video.
Exporting Your Final Video
The final step: getting your masterpiece ready for the world.
1. Export Settings for Marketing Platforms
The right export settings ensure quality and compatibility.
- Open Export Mode: Go to File > Export > Media… (or Ctrl+M/Cmd+M). This opens the new, streamlined Export Mode in Premiere Pro 2026.
- Select Destination: Under “File Name,” click the blue text to choose your output folder and name your file (e.g., “Product Launch Ad – Final.mp4”).
- Choose Preset: Under “Preset,” you’ll find various options. For general web and social media, I highly recommend starting with “Match Source – Adaptive High Bitrate.” This usually provides a great balance of quality and file size.
- Platform-Specific Presets: Premiere Pro 2026 now offers direct export presets for major platforms. For example, under the “Social Media” category, you might see “YouTube 1080p Full HD” or “Facebook 1080p.” These are excellent starting points.
- Video & Audio Tabs: If you need finer control, click the “Video” or “Audio” tabs on the left. Here you can adjust “Format” (H.264 is standard), “Codec,” “Bitrate Settings” (VBR, 1-pass is usually sufficient for marketing), and “Frame Rate.” For most marketing, a target bitrate of 15-25 Mbps for 1080p is a good sweet spot.
Pro Tip: Always export a short test clip (just 10-15 seconds) first, especially if you’re using custom settings, to verify quality and file size before rendering the entire video. This saves immense time if you need to make adjustments.
Common Mistake: Exporting with excessively high bitrates (creating huge files that are slow to upload and stream) or excessively low bitrates (resulting in pixelated, low-quality video).
Expected Outcome: A high-quality, optimized video file ready for upload to your chosen marketing platforms.
2. Using Adobe Media Encoder for Batch Exports
If you need to export multiple versions (e.g., for YouTube, Instagram, and a website), use Media Encoder.
- Send to Media Encoder: Instead of clicking “Export” in Premiere Pro’s Export Mode, click the “Queue” button. This sends your sequence to Adobe Media Encoder.
- Add Multiple Outputs: In Media Encoder, your sequence will appear in the “Queue” panel. Click the small plus icon next to your sequence to add another output. Select different presets for each output (e.g., one for “YouTube 1080p,” another for “Instagram 1×1 1080p”).
- Start Queue: Click the green “Start Queue” button (top-right) to render all versions automatically.
Pro Tip: Media Encoder allows you to continue working in Premiere Pro while it renders in the background. This is invaluable for busy marketers. I once had a major product launch video that required 10 different aspect ratios and resolutions for various platforms. Media Encoder saved me an entire day of babysitting exports.
Common Mistake: Manually exporting each version from Premiere Pro, tying up your editing software and slowing down your workflow.
Expected Outcome: Multiple optimized video files, each tailored for specific marketing platforms, rendered efficiently in the background.
Mastering these Premiere Pro fundamentals empowers you to create compelling video content that drives marketing results. The investment in learning this software pays dividends in creative control, agility, and cost savings. For more insights on how to improve your overall video ad strategy and boost ROI, explore our other resources. If you’re struggling with vertical video flops, these Premiere Pro skills are especially critical. Additionally, understanding how to boost ad performance with short-form video will complement your editing expertise.
What’s the best resolution for marketing videos in 2026?
For most marketing videos targeting social media and websites, 1080p (1920×1080 pixels) is still the standard. While 4K is becoming more common, 1080p offers a great balance of quality, file size, and compatibility across devices without requiring excessive bandwidth for viewers. Consider 4K if your content is highly visual, detail-oriented, and primarily viewed on larger screens or platforms that prioritize 4K playback.
How important is music in a marketing video?
Music is incredibly important. It sets the tone, evokes emotion, and can significantly impact viewer engagement. Choose royalty-free music that aligns with your brand identity and the message of your video. Ensure the music doesn’t overpower dialogue or key sound effects. A well-chosen track can elevate a good video to a great one, while poor music can detract from even the best visuals.
Should I use stock footage or shoot my own?
It depends on your budget, time, and specific needs. Shooting your own footage allows for complete creative control and authenticity, which can build stronger connections with your audience. However, high-quality stock footage can be an excellent solution for B-roll, establishing shots, or concepts that are difficult or expensive to film yourself. Many successful marketing videos blend both, using custom footage for primary messaging and stock for supplementary visuals.
How long should a marketing video be?
Video length is highly dependent on the platform and your objective. For social media ads, aim for 15-30 seconds. Explainer videos or website content might be 1-2 minutes. Longer-form content (5+ minutes) is typically reserved for in-depth tutorials, webinars, or brand storytelling on platforms like YouTube. Always prioritize getting your message across concisely; viewers have short attention spans.
Can I edit on a slow computer?
While Premiere Pro can run on various systems, editing modern video (especially 4K) on a slow computer will be a frustrating experience. You’ll encounter constant lagging, crashes, and extremely slow render times. A dedicated graphics card (GPU), a fast multi-core processor (CPU), and at least 16GB (preferably 32GB or more) of RAM are highly recommended for a smooth editing workflow. A fast SSD for your project files and media is also critical.


