Mastering Adobe Premiere Pro for Marketing Content: A Step-by-Step Guide
Crafting compelling video content is no longer optional for marketers in 2026; it’s a fundamental requirement. This guide offers practical tutorials on video editing software, specifically Adobe Premiere Pro, designed to help you produce polished, engaging marketing assets efficiently.
Key Takeaways
- Learn to navigate Premiere Pro’s 2026 interface, focusing on essential panels like Project, Source, Program, and Timeline for efficient workflow.
- Master the core editing techniques including importing, trimming, splitting, and adding transitions to construct a cohesive marketing video.
- Discover how to enhance your video with text overlays, graphics, color correction, and audio adjustments for professional-grade results.
- Understand the optimal export settings for various marketing platforms to ensure maximum impact and quality.
I’ve been in marketing for over a decade, and I’ve seen firsthand how high-quality video can transform a campaign. A recent eMarketer report projects global digital video ad spending to exceed $300 billion by 2026, underscoring its undeniable power. You simply cannot afford to deliver anything less than excellent.
Setting Up Your Project: The Foundation of Any Great Video
Before you even think about cutting footage, you need to set up your project correctly. This isn’t just about organization; it’s about optimizing your workflow from the jump.
1.1 Create a New Project
- Launch Adobe Premiere Pro.
- On the Welcome Screen, click New Project. If you’re already in the application, go to the top menu bar, select File > New > Project…
- In the New Project dialog box, find the Name field and type a descriptive name for your project (e.g., “Q3_ProductLaunch_Ad”).
- For Location, click Browse… and select a dedicated folder on your local drive for this project. I always create a “Premiere Projects” folder for all my work, and then subfolders for each client or campaign. This keeps my media organized and prevents those dreaded “media offline” errors.
- Under the General tab, ensure Video Rendering and Playback is set to Mercury Playback Engine GPU Acceleration (CUDA/OpenCL/Metal) if your system supports it. This will make your editing experience significantly smoother. If not, use “Software Only” but be prepared for slower performance.
- Click OK.
Pro Tip: Always save your project frequently (Ctrl+S or Cmd+S). Premiere Pro has an auto-save feature, but manual saves are your best friend against unexpected crashes. Trust me, I learned this the hard way after losing an hour’s worth of intricate edits on a client’s explainer video.
Common Mistake: Saving your project file directly onto a network drive or cloud sync folder without proper caching settings. This can lead to project corruption and slow performance. Keep your active project files and media local.
Expected Outcome: An empty Premiere Pro project window opens, displaying the default workspace layout, ready for you to import your assets.
Importing and Organizing Your Media: The Digital Asset Manager’s Role
A well-organized project is a fast-moving project. Think of your Project panel as your digital asset manager. Clutter here means frustration later.
2.1 Import Your Footage and Assets
- In the bottom-left of the interface, locate the Project panel (it’s usually labeled with your project name).
- Double-click within the empty space of the Project panel. This opens the Import dialog box.
- Navigate to the folder where your video clips, images, audio files, and graphics are stored.
- Select all the files you want to import. You can select multiple files by holding down Ctrl (Windows) or Cmd (Mac) and clicking each file, or by clicking the first file, holding Shift, and clicking the last file to select a range.
- Click Import.
Pro Tip: Create bins (folders) within your Project panel to categorize your media. Right-click in the Project panel, select New Bin, and name it (e.g., “Video Footage,” “Music,” “Graphics,” “Voiceovers”). Drag your imported assets into their respective bins. This small step saves hours when you’re hunting for a specific clip in a large project.
Common Mistake: Importing everything without organization. When you have 50 clips and 10 audio tracks, finding the right asset becomes a nightmare. Organize early, organize often.
Expected Outcome: All your selected media files appear as thumbnails or list items within the Project panel, neatly organized into bins if you followed the pro tip.
Assembling Your First Sequence: Building the Narrative
The sequence is where the magic happens – where individual clips transform into a story. This is your canvas.
3.1 Create a New Sequence
- In the Project panel, locate one of your main video clips.
- Drag this video clip directly onto the Timeline panel (the large panel usually in the bottom-right). Premiere Pro will automatically create a new sequence that matches the settings of your first clip. This is the fastest way to get started.
- Alternatively, you can go to the top menu bar, select File > New > Sequence…, choose a preset (e.g., Digital SLR > 1080p > DSLR 1080p24 for cinematic marketing content), and click OK.
3.2 Basic Editing: Trimming and Arranging Clips
- In the Project panel, double-click a video clip. It will open in the Source Monitor (top-left panel).
- Use the Playhead (the blue indicator) and the Mark In (I) and Mark Out (O) buttons below the Source Monitor to define the portion of the clip you want to use.
- Drag the trimmed clip from the Source Monitor directly onto your Timeline panel. Place it on a video track (e.g., V1).
- To trim clips directly on the Timeline: Hover your mouse over the edge of a clip until the cursor changes to a red bracket. Click and drag inward to shorten the clip or outward to extend it.
- To split a clip: Position the Playhead where you want to cut, then select the Razor Tool (C) from the Tools panel (usually to the left of the Timeline) and click on the clip. Switch back to the Selection Tool (V) to move or delete segments.
- Arrange your clips in the desired order by dragging them along the Timeline.
Pro Tip: Use keyboard shortcuts! I for In-point, O for Out-point, C for Razor Tool, V for Selection Tool. Learning these will dramatically speed up your editing. I once had to cut down a 20-minute product demo into a 60-second Instagram Reel, and without shortcuts, I would have been there all day.
Common Mistake: Over-editing in the Source Monitor. Sometimes it’s faster to drop a slightly longer clip into the Timeline and then fine-tune the trims there, especially if you’re experimenting with pacing.
Expected Outcome: A rough cut of your marketing video, with clips arranged sequentially on the Timeline, forming the basic structure of your message.
“AI email marketing tools are software platforms that apply machine learning, predictive analytics, and generative AI to execute email campaigns. These tools analyze customer data and campaign performance to automate decisions that traditionally required manual effort, like writing copy or choosing send times.”
Enhancing Your Video: Graphics, Text, and Audio
Raw footage is rarely enough. Polish is what separates amateur content from professional marketing assets.
4.1 Adding Text Overlays and Graphics
- Go to the Graphics workspace (top menu bar: Window > Workspaces > Graphics). This opens the Essential Graphics panel.
- In the Essential Graphics panel (right side of the interface), click Browse to explore pre-made motion graphics templates. Or, click Edit and then the New Layer icon (a square with a plus sign) to add a new Text Layer or Shape Layer.
- For a simple text overlay: Click the New Layer icon and choose Text. A text box will appear in your Program Monitor (top-right panel).
- Double-click the text in the Program Monitor to type your message (e.g., “Limited Time Offer!”).
- In the Essential Graphics panel (under the Edit tab), you can adjust font, size, color, alignment, and add shadows or backgrounds.
- Drag the text layer on the Timeline to adjust its duration and position over your video clips. For marketing, clear calls to action (CTAs) are paramount.
4.2 Basic Color Correction
- Go to the Color workspace (Window > Workspaces > Color). This opens the Lumetri Color panel.
- Select a video clip on your Timeline.
- In the Lumetri Color panel, expand the Basic Correction section.
- Adjust White Balance using the eyedropper tool or temperature/tint sliders.
- Fine-tune Exposure, Contrast, Highlights, Shadows, Whites, and Blacks to achieve a balanced look. The goal is consistency across all your clips, especially for product shots.
- Experiment with Saturation to make colors pop, but don’t overdo it.
Pro Tip: For consistent branding, create a specific color correction preset. Once you’ve perfected the look for one clip, click the three horizontal lines icon in the Lumetri Color panel and choose Save Preset… You can then apply this preset to all other clips with one click.
Common Mistake: Over-saturating or over-exposing footage. While you want your product to look vibrant, an unnatural look can detract from your message. Subtlety often wins.
Expected Outcome: Your video now features clear text overlays and graphics, and the footage has a more consistent, professional color grade, making it visually appealing and on-brand.
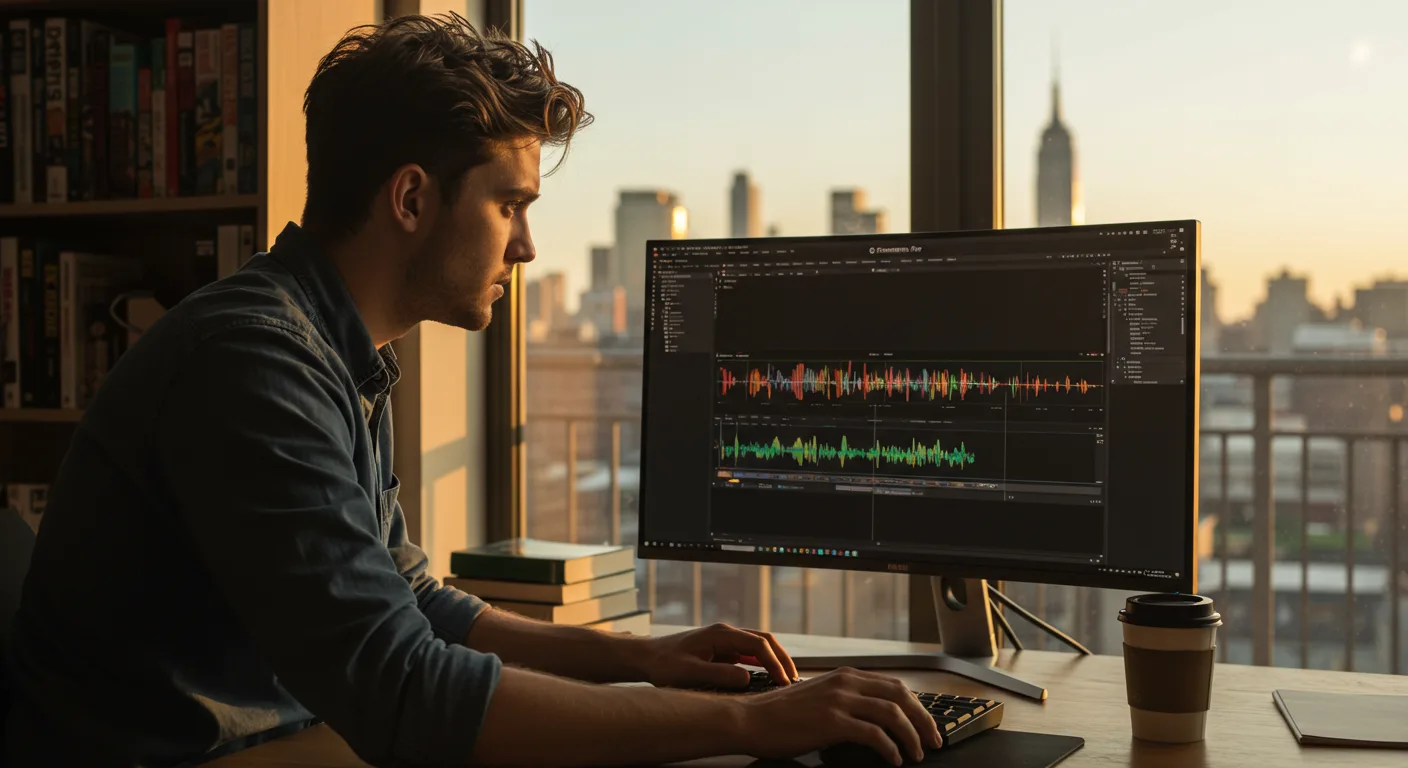
4.3 Adjusting Audio Levels and Adding Music
- Go to the Audio workspace (Window > Workspaces > Audio). This opens the Essential Sound panel and Audio Track Mixer.
- Drag your background music track from the Project panel onto an audio track (e.g., A2 or A3) on the Timeline, below your primary audio (like a voiceover).
- Select the music track on the Timeline. In the Essential Sound panel, choose Music as the audio type.
- Under the Loudness section, click Auto-Match. This helps normalize the volume.
- Manually adjust the volume of your music track by dragging the yellow line on the clip itself, or by using the Clip Volume slider in the Essential Sound panel. Your voiceover or primary audio should always be clearly audible over background music. A good starting point is -20dB to -25dB for background music.
- Add a Crossfade transition (Effects panel > Audio Transitions > Crossfade) to the beginning and end of your music track for a smooth fade-in/fade-out. Drag Constant Power onto the ends of the music track.
Pro Tip: Use the Audio Track Mixer (Window > Audio Track Mixer > [Your Sequence Name]) to see real-time audio levels. Aim for your primary audio (voiceover) to peak around -6dB and background music to stay consistently lower, around -20dB to -25dB. This ensures clarity. I recently worked on a campaign for a local Atlanta business, “Piedmont Park Yoga,” and getting the instructor’s voice clear over the ambient meditation music was absolutely critical for the success of their online class promotions.
Common Mistake: Loud background music drowning out the primary audio. This is a rookie mistake that immediately makes your video sound unprofessional.
Expected Outcome: Your video has a balanced audio mix, with clear primary audio and appropriately leveled background music, contributing to a professional and engaging viewer experience.
Exporting Your Masterpiece: Delivering for Marketing Platforms
The final step is arguably the most important. Incorrect export settings can render all your hard work useless.
5.1 Exporting for Various Platforms
- Once your video is complete, go to File > Export > Media… (or use the shortcut Ctrl+M or Cmd+M). This opens the Export Settings dialog box.
- Format: For most marketing purposes, H.264 is the go-to format. It offers excellent quality at manageable file sizes.
- Preset: This is where platform specificity comes in.
- For general web use (your website, YouTube): Choose Match Source – Adaptive High Bitrate.
- For Instagram (Reels/Feed): Select Social Media > Instagram 1080p Full HD.
- For LinkedIn: Choose Social Media > LinkedIn 1080p Full HD.
- For Facebook: Select Social Media > Facebook 1080p Full HD.
These presets are optimized for each platform’s recommendations, ensuring good quality without excessively large files.
- Output Name: Click the blue text next to “Output Name” to choose your save location and name your exported file (e.g., “Q3_ProductLaunch_Ad_Final.mp4”).
- Video Tab:
- Ensure Width and Height match your sequence (e.g., 1920×1080 for 1080p).
- Scroll down to Bitrate Settings. For H.264, set Bitrate Encoding to VBR, 2 Pass. This takes longer but provides better quality for a given file size. Set Target Bitrate [Mbps] to 10-15 for 1080p video for web. For 4K, you’d be looking at 30-50 Mbps.
- Audio Tab: Ensure Audio Format is AAC, Sample Rate is 48000 Hz, and Bitrate is 320 kbps for high-quality audio.
- Click Export.
Pro Tip: Always export a small test segment (by setting In and Out points on your Timeline and checking “Sequence In/Out” in the Export dialog) if you’re unsure about settings for a new platform. This saves you from exporting a full video only to find out the quality is off.
Common Mistake: Exporting with excessively high bitrates for web platforms. While it might look slightly better, the file size becomes enormous, leading to slow load times and buffering for your audience. Conversely, too low a bitrate results in pixelated, blocky video, which is unacceptable for marketing.
Expected Outcome: A high-quality, optimized video file ready for upload to your chosen marketing platforms, perfectly balancing visual fidelity with efficient file size.
Mastering video editing for marketing is an ongoing journey, but by following these detailed steps within Adobe Premiere Pro, you’ll be well on your way to creating compelling visual stories that resonate with your audience and drive results. The tools are powerful, but your creative vision and attention to detail are what truly make the difference. For more insights on maximizing your marketing ROI, consider exploring new ad formats in 2026. These new formats, often driven by AI, can further enhance the impact of your skillfully edited videos and help you prove their value.
What are the minimum system requirements for running Adobe Premiere Pro effectively in 2026?
While specific requirements can vary, for smooth editing of 1080p marketing videos, I recommend at least an Intel 11th Gen or AMD Ryzen 5000 series processor, 32GB RAM, an NVIDIA RTX 30-series or AMD Radeon RX 6000-series GPU with 8GB VRAM, and an NVMe SSD for both your operating system and media files. For 4K editing, these specs should be significantly higher.
How do I add brand-specific lower thirds or intro/outro animations?
You can import pre-made motion graphics templates (often called MOGRTs) into Premiere Pro. In the Essential Graphics panel, navigate to the “Browse” tab, and then click the “+” icon at the bottom to import your .mogrt files. Once imported, you can drag them onto your timeline and customize their text, colors, and sometimes even animation properties directly within the Essential Graphics panel’s “Edit” tab to match your brand guidelines.
What’s the best way to ensure my video’s aspect ratio is correct for different social media platforms?
When creating a new sequence, choose the appropriate preset: 16:9 for YouTube/Web (1920×1080), 1:1 for square Instagram posts (1080×1080), or 9:16 for vertical Reels/Stories (1080×1920). If you’ve already edited in one aspect ratio, you can duplicate your sequence (right-click sequence in Project panel > Duplicate), then go to Sequence > Sequence Settings and change the frame size. You’ll then need to manually adjust your clips’ scaling and positioning in the Effect Controls panel for the new aspect ratio.
My Premiere Pro is running slow. What can I do?
First, ensure your system meets minimum requirements. Then, try clearing your media cache (Edit > Preferences > Media Cache > Delete Unused Media Cache Files). Allocate more RAM to Premiere Pro (Edit > Preferences > Memory). Use proxy workflows for high-resolution footage (right-click clip in Project panel > Proxy > Create Proxies). Finally, ensure your GPU drivers are up to date and that you’re using GPU acceleration in your project settings.
Where can I find royalty-free music and stock footage for my marketing videos?
There are numerous reputable sources. For music, consider services like Epidemic Sound, Artlist, or Adobe Stock Audio, which offer subscription models for commercial use. For stock footage, explore platforms such as Adobe Stock Video, Storyblocks, or Envato Elements. Always double-check the licensing terms to ensure compliance with commercial use for your marketing campaigns.


