Adobe Premiere Pro isn’t just another video editor; it’s a foundational pillar for modern digital marketing, reshaping how brands connect with audiences through compelling visual narratives. Its powerful features and intuitive interface empower marketers to produce high-quality content at scale, fundamentally altering the speed and sophistication of campaign deployment. But how exactly is this software enabling marketers to redefine engagement and drive measurable results?
Key Takeaways
- Mastering Dynamic Link between Premiere Pro and After Effects significantly reduces rendering time by eliminating intermediate exports for motion graphics.
- Implementing Proxy workflows in Premiere Pro is essential for efficient editing of high-resolution footage, especially for teams working remotely or with older hardware.
- Leveraging Team Projects allows for simultaneous collaboration on video edits, drastically cutting down project timelines for complex marketing campaigns.
- Utilizing Essential Graphics Panel templates standardizes brand visuals across multiple videos, ensuring consistency without requiring advanced animation skills.
- Exporting with H.265 (HEVC) codec settings in Premiere Pro delivers superior quality at smaller file sizes, optimizing content delivery across diverse platforms.
1. Setting Up Your Project for Maximum Efficiency: The Foundation of Any Marketing Campaign
Before you even import a single clip, proper project setup in Adobe Premiere Pro is non-negotiable for marketing teams. I’ve seen countless projects derail because someone started editing with default settings, leading to frustrating bottlenecks later on. My philosophy? Plan for scale, even if you’re just making a quick social ad.
First, open Premiere Pro and select New Project. Name your project something descriptive, like “Q3_BrandCampaign_ProductLaunch_2026.” For the Scratch Disks settings, always choose “Same as Project” unless you have a dedicated, fast external drive for media caches. This keeps everything organized.
Next, and this is critical, navigate to File > Project Settings > General. Here, ensure your Renderer is set to Mercury Playback Engine GPU Acceleration (CUDA/OpenCL/Metal). If you don’t have a dedicated GPU, you’ll see “Software Only,” which means slower performance – a serious handicap for marketing agencies pumping out daily content. For Video Display Format, I always recommend Timecode over Frames. It’s just more intuitive for pacing out marketing messages.
Screenshot Description: A screenshot of the New Project dialog box in Adobe Premiere Pro, highlighting the “Scratch Disks” section set to “Same as Project” and the “Renderer” option under “General” project settings, showing “Mercury Playback Engine GPU Acceleration (CUDA)” selected.
Pro Tip: Optimize Ingest Settings
Go to Edit > Preferences > Media. Check the box for “Ingest” and select “Create Proxies.” This is a lifesaver for marketing teams dealing with 4K or 8K footage from new cameras (or even client-provided raw files). Proxies are lower-resolution copies that make editing smooth, and Premiere Pro automatically swaps them out for the full-resolution files on export. This isn’t optional; it’s essential for maintaining flow when deadlines loom.
Common Mistake: Disorganized Media Management
Never, ever just dump all your media files into one folder. Create a structured folder system before importing. My standard structure for a marketing video project: `ProjectName > Footage`, `ProjectName > Graphics`, `ProjectName > Audio`, `ProjectName > Exports`. This prevents hours of searching for that one specific B-roll clip when a client demands a last-minute change.
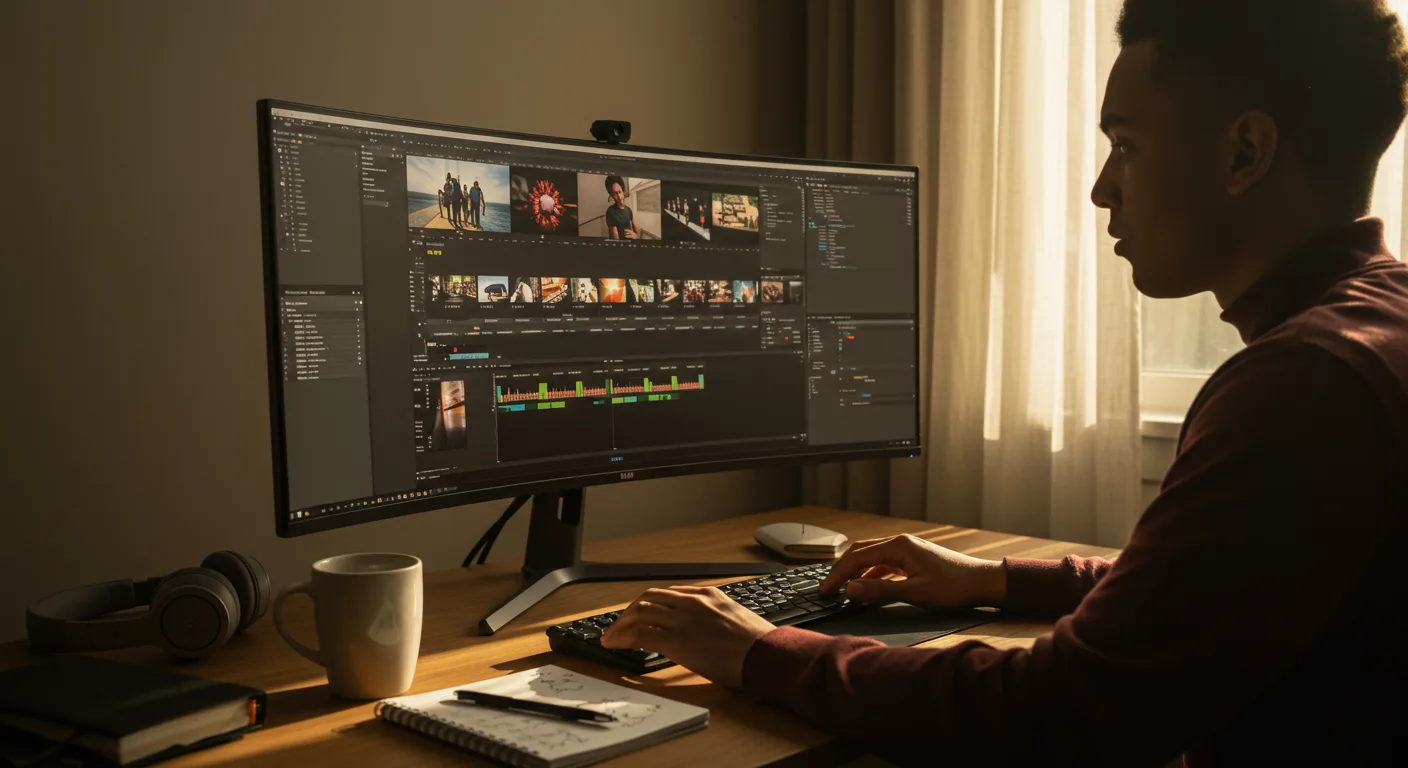
2. Mastering the Art of Efficient Editing: Speed is King in Marketing
In the fast-paced world of marketing, every second counts. The ability to edit quickly and effectively directly translates to more content, more campaigns, and ultimately, more conversions. Premiere Pro offers several features that, when used correctly, dramatically reduce editing time.
Once your media is imported into your structured bins, start building your rough cut. I usually begin by creating a Sequence that matches my target output – typically 1920×1080 for web, or 1080×1920 for vertical social media ads. To do this, go to File > New > Sequence. Under Settings, choose a custom setting if you don’t have a preset. My go-to for most marketing content is Editing Mode: Custom, Timebase: 29.97 fps, Frame Size: 1920 horizontal, 1080 vertical (or vice versa for vertical video), and Pixel Aspect Ratio: Square Pixels (1.0).
Focus on keyboard shortcuts. Seriously. Learning shortcuts like C (Razor Tool), V (Selection Tool), Q (Ripple Trim Previous Edit to Playhead), and W (Ripple Trim Next Edit to Playhead) will halve your editing time. I’ve trained junior editors who initially resisted, only to become lightning-fast once they committed to using them. It’s an investment that pays dividends daily.
Screenshot Description: A close-up of the Premiere Pro timeline, showing several video and audio tracks, with the playhead positioned over a clip. The Razor Tool (C) and Selection Tool (V) icons are highlighted in the Tools panel.
Pro Tip: Leveraging Adjustment Layers for Global Effects
Instead of applying the same color correction or sharpening effect to individual clips, create an Adjustment Layer (File > New > Adjustment Layer) and place it above all your video tracks. Apply your effects to this layer. Any effect on the adjustment layer will affect all clips beneath it. This is incredibly powerful for maintaining visual consistency across an entire marketing video and making global changes in seconds. Need to tweak the saturation for the whole ad? One layer, one change.
Common Mistake: Over-reliance on Lumetri Scopes for Quick Grades
While the Lumetri Color panel is fantastic, don’t spend hours meticulously color grading a social media ad that will be viewed on a phone. Focus on broad strokes for consistency and brand identity. Use the Basic Correction tab for white balance and exposure, then the Creative tab for a quick look. For detailed client work, yes, dig into curves and wheels, but for rapid-fire marketing content, efficiency trumps perfection here.
3. Integrating Motion Graphics and Visual Effects: Elevating Your Brand Story
Static text is dead. In marketing, motion graphics are essential for capturing attention and conveying complex information quickly. Premiere Pro’s integration with Adobe After Effects and its built-in Essential Graphics Panel are absolute game-changers.
The Essential Graphics Panel is where the magic happens for marketers who aren’t After Effects wizards. You can create custom lower thirds, title cards, and even animated call-to-action overlays directly within Premiere. Go to Window > Essential Graphics. Here, you can browse templates, or create your own. For instance, I recently built a set of branded text animations for a client’s new product launch, ensuring every video shared the same polished look without needing a motion designer for each asset.
Screenshot Description: The Essential Graphics Panel in Adobe Premiere Pro, showing several motion graphics templates, with one selected and its customizable text, font, color, and position properties displayed.
Pro Tip: Dynamic Link is Your Best Friend
When you do need more complex animations that require After Effects, use Dynamic Link. Right-click on a clip or a sequence in Premiere Pro and select “Replace with After Effects Composition.” This opens the selected content in After Effects, and any changes you make there are automatically updated in Premiere Pro without rendering. This saves hours – literally hours – of export/import cycles, especially when client feedback means multiple animation revisions. We had a client, a local Atlanta e-commerce brand, who needed animated product feature callouts. Using Dynamic Link, we iterated on 15 different animations in a single afternoon, something that would have taken days with traditional workflows.
Common Mistake: Overdoing the Effects
Just because you can add a flashy transition or a complex animation doesn’t mean you should. Marketing videos need to be clear and concise. Too many effects can be distracting and make your message harder to understand. Keep it clean, on-brand, and purposeful. A subtle text animation is often more effective than a dizzying explosion.
4. Crafting Compelling Sound Design: The Unsung Hero of Marketing Videos
Visuals grab attention, but sound holds it. Poor audio quality or a lack of thoughtful sound design can sink even the most visually stunning marketing video. Premiere Pro offers robust audio tools that are often overlooked.
First, always ensure your dialogue is clear. Use the Essential Sound Panel (Window > Essential Sound) and assign clips as Dialogue. Then, use the Loudness controls to auto-match volume and the Repair section for noise reduction. I always apply Adaptive Noise Reduction with a slight reduction (e.g., -6 dB) to interview audio. Next, choose appropriate background music. Premiere Pro integrates with Adobe Stock Audio, making it easy to find licensed tracks. Once your music is in place, assign it as Music in the Essential Sound Panel and use Ducking to automatically lower its volume when dialogue is present. This is a massive time-saver.
Screenshot Description: The Essential Sound Panel in Adobe Premiere Pro, with the “Dialogue” category selected. Controls for “Loudness,” “Repair” (including “Reduce Noise”), and “Clarity” are visible.
Pro Tip: Use Audio Keyframes for Finer Control
While ducking is great, sometimes you need more nuanced control. Hold Ctrl (Windows) or Cmd (Mac) and click on the audio waveform in the timeline to create keyframes. You can then drag these keyframes up or down to precisely adjust volume at specific points. This is perfect for emphasizing a particular word or fading out music at the end of a segment. We often use this for our client, “Peach State Provisions” (a fictional local gourmet food delivery service), to subtly lower music when their founder speaks about their ingredients, then raise it slightly during B-roll of food prep.
Common Mistake: Neglecting Sound Effects
Sound effects might seem minor, but they add immense production value. A subtle whoosh for a title card, a click for a button animation, or ambient sounds to fill a silent space can make a video feel more professional and engaging. Don’t just rely on music and dialogue; think about the sonic texture of your marketing message.
5. Optimizing Export Settings for Diverse Marketing Platforms: Reaching Every Audience
You’ve edited a masterpiece, but if you export it incorrectly, all that hard work is wasted. Different platforms (YouTube, Instagram Reels, LinkedIn, website embeds) have different requirements, and Premiere Pro handles them all.
Go to File > Export > Media. The Export Settings dialog box is your final frontier. For Format, I almost exclusively use H.264 for web and social media. It offers excellent compression and quality. However, if you’re targeting higher quality or smaller file sizes for specific platforms that support it, HEVC (H.265) is becoming increasingly viable.
Under Preset, select something appropriate, like “YouTube 1080p Full HD” or “Vimeo 1080p HD.” Then, crucially, check the “Output Name” and give your file a clear, descriptive name.
Screenshot Description: The Export Settings dialog box in Adobe Premiere Pro, showing H.264 selected as the Format, a preset like “YouTube 1080p Full HD” chosen, and the “Output Name” field highlighted for renaming the exported file.
Pro Tip: Custom Export for Social Media
While presets are a good starting point, I often create custom export settings for social media. For Instagram Reels, for example, I’ll set Format: H.264, Width: 1080, Height: 1920, Frame Rate: 29.97, Profile: High, Level: 4.2, and Target Bitrate: 10-12 Mbps (VBR, 1 Pass). This ensures maximum quality within the platform’s constraints. A Statista report from early 2026 confirms the continued dominance of video content on these platforms, making optimized exports paramount. This also helps with Gen Z marketing.
Common Mistake: Exporting with Default Settings
Never just hit “Export” with the default settings. You’ll either end up with a massive file that takes forever to upload or a low-quality, pixelated mess. Always review the Summary tab in the Export Settings to ensure the resolution, frame rate, and estimated file size are appropriate for your target platform. Premiere Pro boosts marketing conversions when used effectively.
Adobe Premiere Pro isn’t just a tool; it’s an ecosystem that empowers marketing professionals to create, collaborate, and distribute compelling video content with unprecedented speed and quality. By mastering its core features and adopting efficient workflows, you can significantly enhance your brand’s video marketing efforts and stand out in an increasingly crowded digital space.
What are the minimum system requirements to run Adobe Premiere Pro effectively for marketing video production?
For efficient marketing video production, I recommend at least an Intel 7th Gen or newer CPU (or AMD equivalent), 16 GB RAM (32 GB is ideal), a dedicated GPU with at least 4 GB of VRAM (8 GB+ is better), and a fast SSD for both the operating system and media files. This setup ensures smooth playback and faster rendering times, which are critical when churning out marketing content.
Can I collaborate with team members on a Premiere Pro project without being in the same location?
Absolutely. Premiere Pro’s Team Projects feature is designed specifically for remote collaboration. It allows multiple editors to work on the same project simultaneously, with changes syncing in the cloud. Each team member can create private “sandboxes” for their edits, then share changes with the main project. This has been a lifesaver for our distributed marketing team, allowing us to hit tight deadlines even with editors across different time zones.
How can I ensure my brand’s visual identity is consistent across all videos using Premiere Pro?
The Essential Graphics Panel is your best friend here. Create branded templates for lower thirds, title cards, and end screens with your exact fonts, colors (using hex codes for precision), and logos. Once saved as a Motion Graphics Template (.mogrt), anyone on your team can drag and drop it into a timeline, customize the text, and maintain perfect brand consistency without needing advanced design skills. I insist on this for all my clients, especially those with strict brand guidelines.
What’s the best way to handle large amounts of 4K or 8K footage in Premiere Pro without slowing down my computer?
The most effective strategy is to implement a Proxy workflow. When importing your high-resolution footage, enable “Ingest” and “Create Proxies.” Premiere Pro will generate smaller, lower-resolution versions of your clips that are much easier for your computer to handle during editing. You can then toggle between proxies and full-resolution footage with a single click before export. This significantly speeds up editing, especially on less powerful machines or when working remotely.
Are there any specific Premiere Pro features that are particularly useful for A/B testing different marketing video versions?
Yes, I often use nested sequences for this. You can create a master sequence for your main video, then create duplicate nested sequences for specific sections (e.g., different call-to-action endings, alternative intro hooks). By enabling or disabling these nested sequences in your main timeline, you can quickly render out multiple versions for A/B testing without having to re-edit the entire video each time. It’s a highly efficient way to test what resonates best with your target audience.


